
15. Projects
A Project is a logical collection of Ansible playbooks.
You can manage playbooks and playbook directories by either placing them manually under the Project Base Path on your server, or by placing your playbooks into a source code management (SCM) system supported by AWX, including Git, Subversion, and Red Hat Insights. To create a Red Hat Insights project, refer to Setting up Insights Remediations.
Note
By default, the Project Base Path is /var/lib/awx/projects, but this may have been modified by the administrator. It is configured in /etc/awx/conf.d/custom.py. Use caution when editing this file, as incorrect settings can disable your installation.
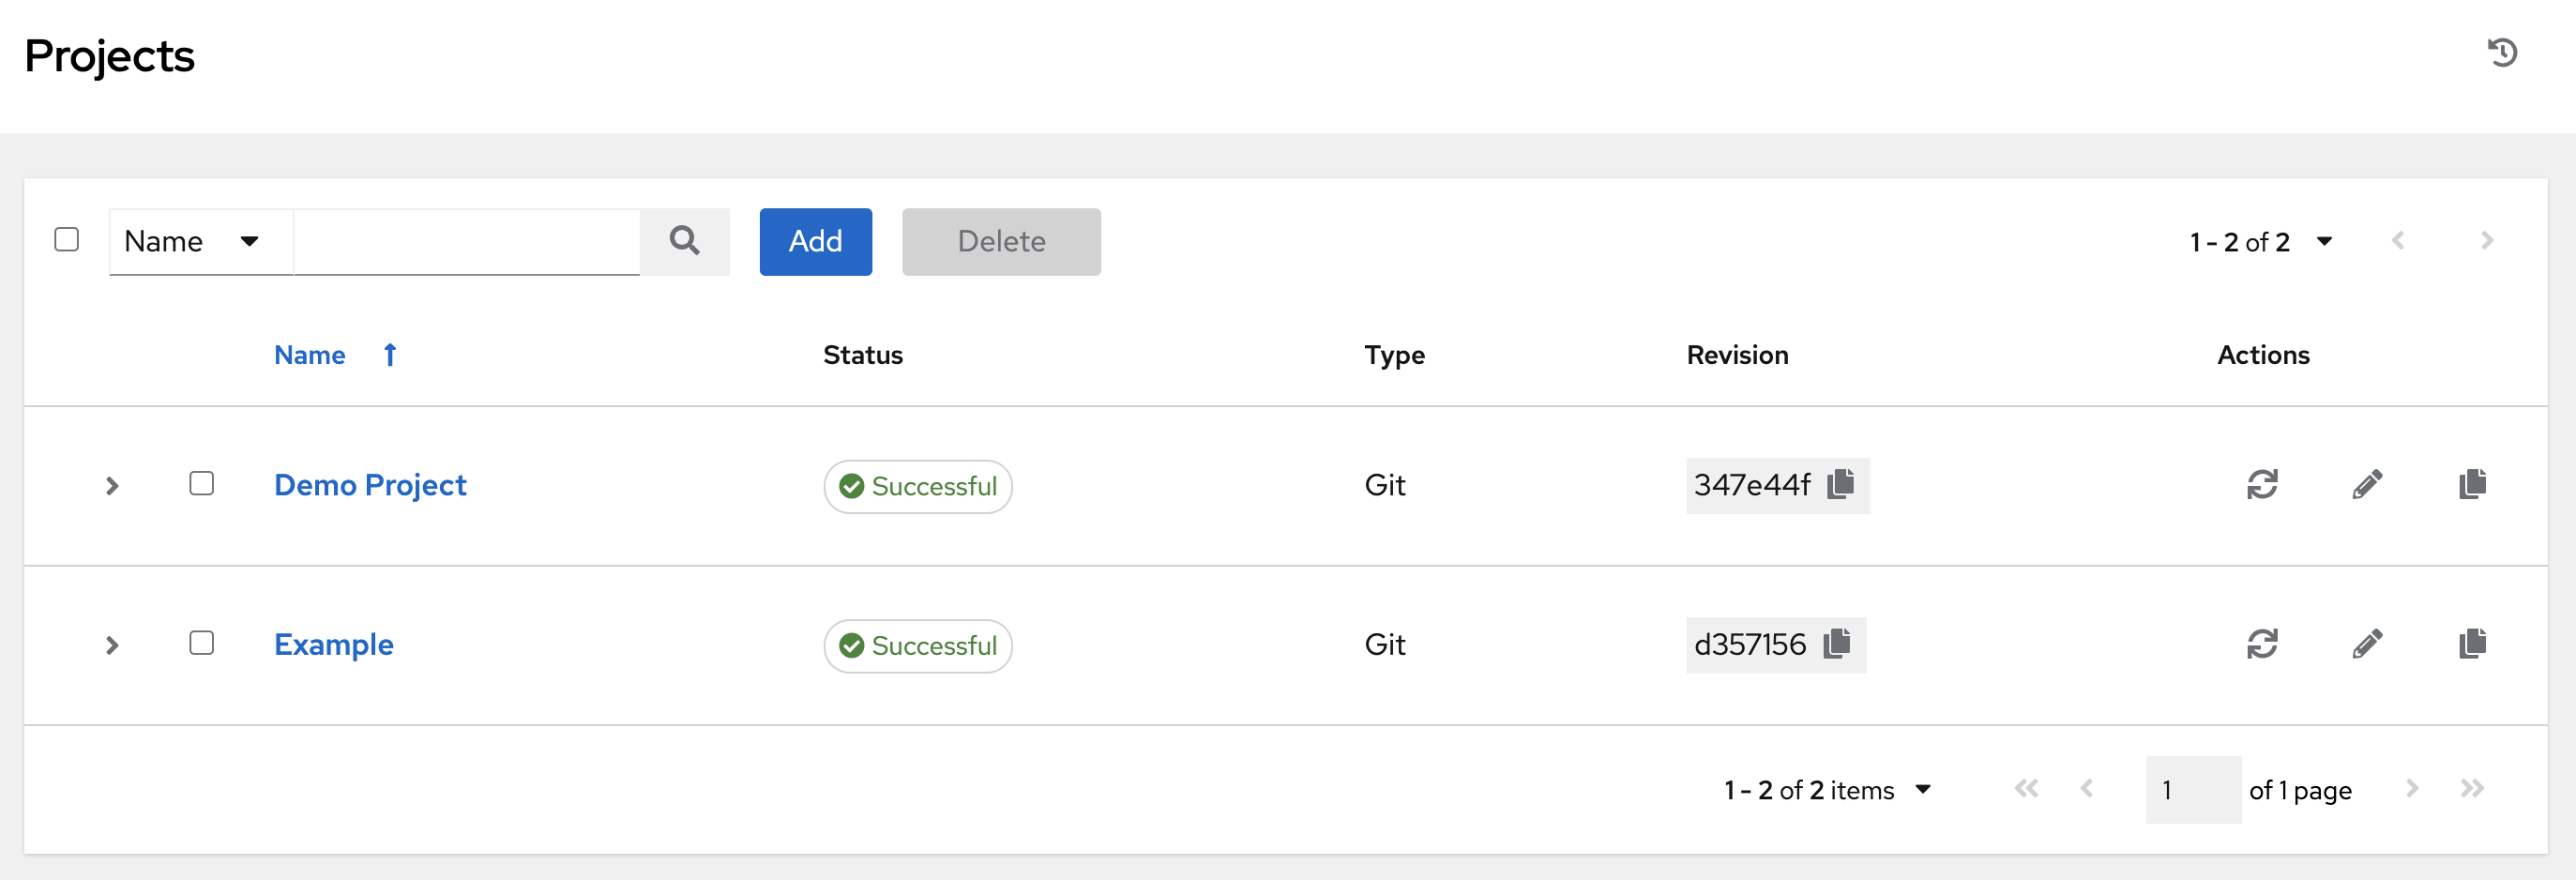
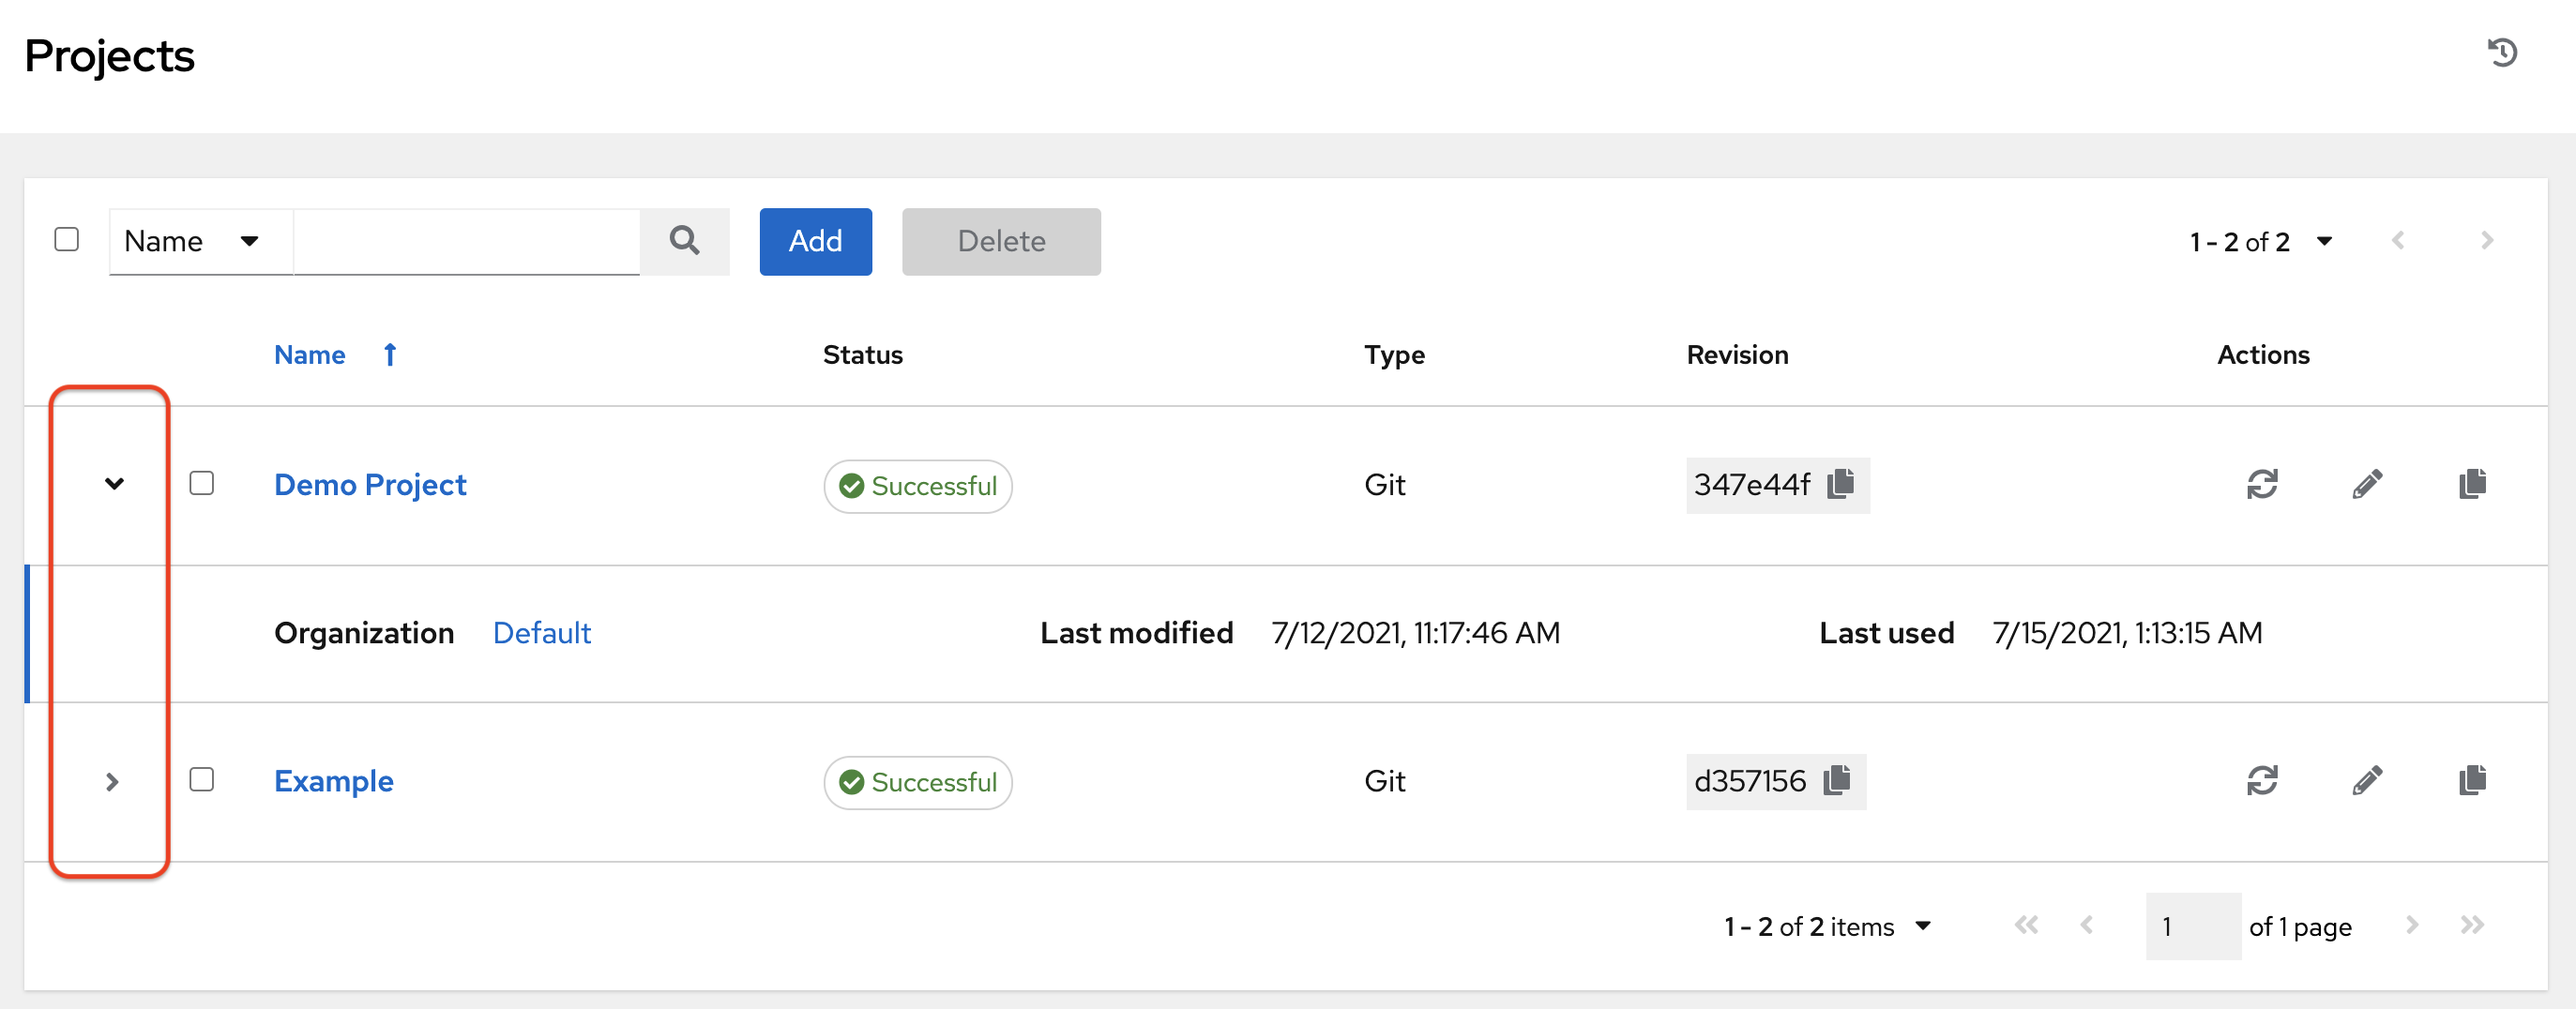
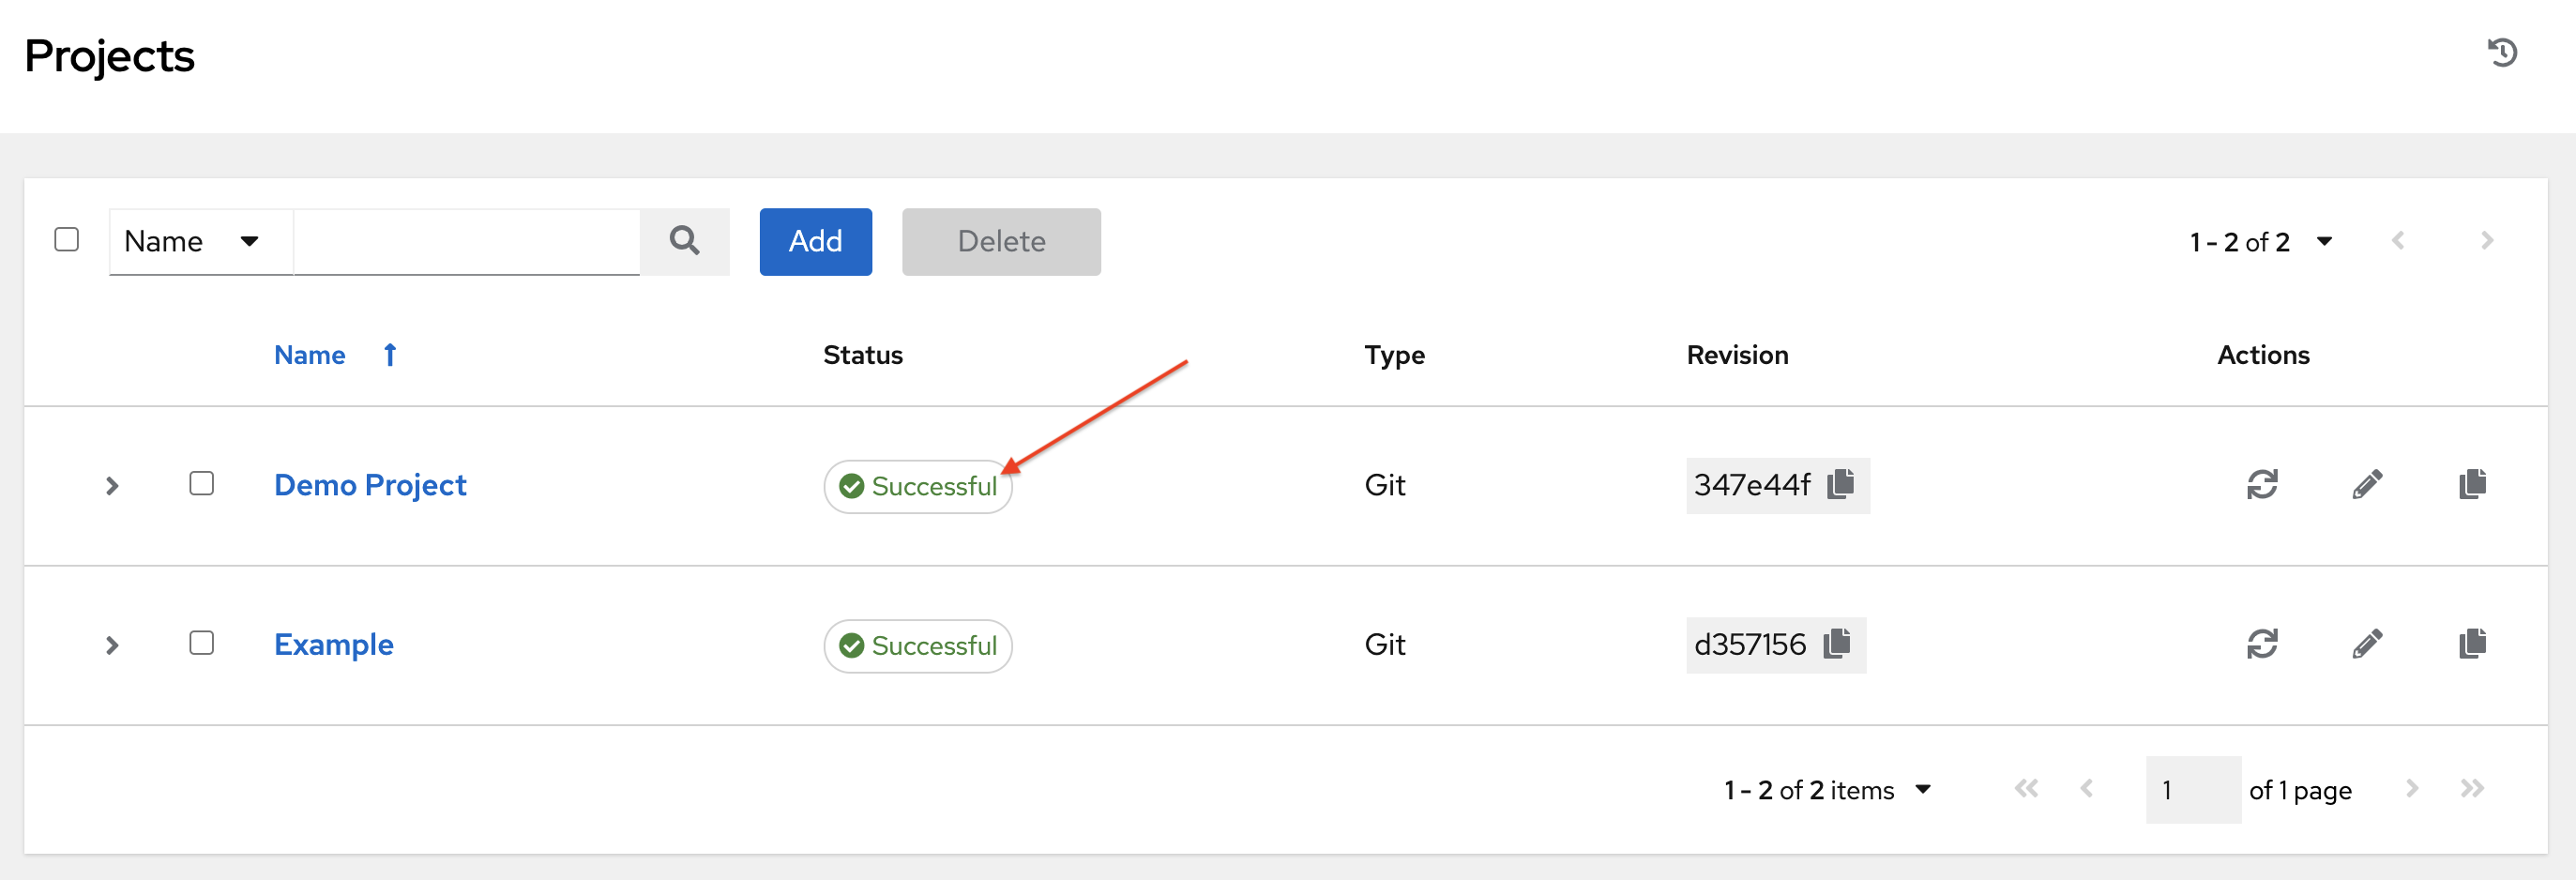
The Projects page displays the list of the projects that are currently available. The default view is collapsed (Compact) with project name and its status, but you can use the arrow next to each entry to expand for more information.
For each project listed, you can get the latest SCM revision ( ), edit the project (
 ), or copy the project attributes (
 ), using the respective icons next to each project. Projects are allowed to be updated while a related job is running. In cases where you have a big project (around 10 GB), disk space on
 /tmp may be an issue.
Status indicates the state of the project and may be one of the following (note that you can also filter your view by specific status types):
Pending - The source control update has been created, but not queued or started yet. Any job (not just source control updates) will stay in pending until it’s actually ready to be run by the system. Reasons for it not being ready because it has dependencies that are currently running so it has to wait until they are done, or there is not enough capacity to run in the locations it is configured to.
Waiting - The source control update is in the queue waiting to be executed.
Running - The source control update is currently in progress.
Successful - The last source control update for this project succeeded.
Failed - The last source control update for this project failed.
Error - The last source control update job failed to run at all. (To be deprecated.)
Canceled - The last source control update for the project was canceled.
Never updated - The project is configured for source control, but has never been updated.
OK - The project is not configured for source control, and is correctly in place. (To be deprecated.)
Missing - Projects are absent from the project base path of
/var/lib/awx/projects(applicable for manual or source control managed projects).
Note
Projects of credential type Manual cannot update or schedule source control-based actions without being reconfigured as an SCM type credential.
Note
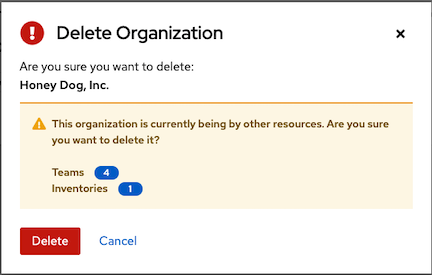
If deleting items that are used by other work items, a message opens listing the items are affected by the deletion and prompts you to confirm the deletion. Some screens will contain items that are invalid or previously deleted, so they will fail to run. Below is an example of such a message:
15.1. Add a new project
To create a new project:
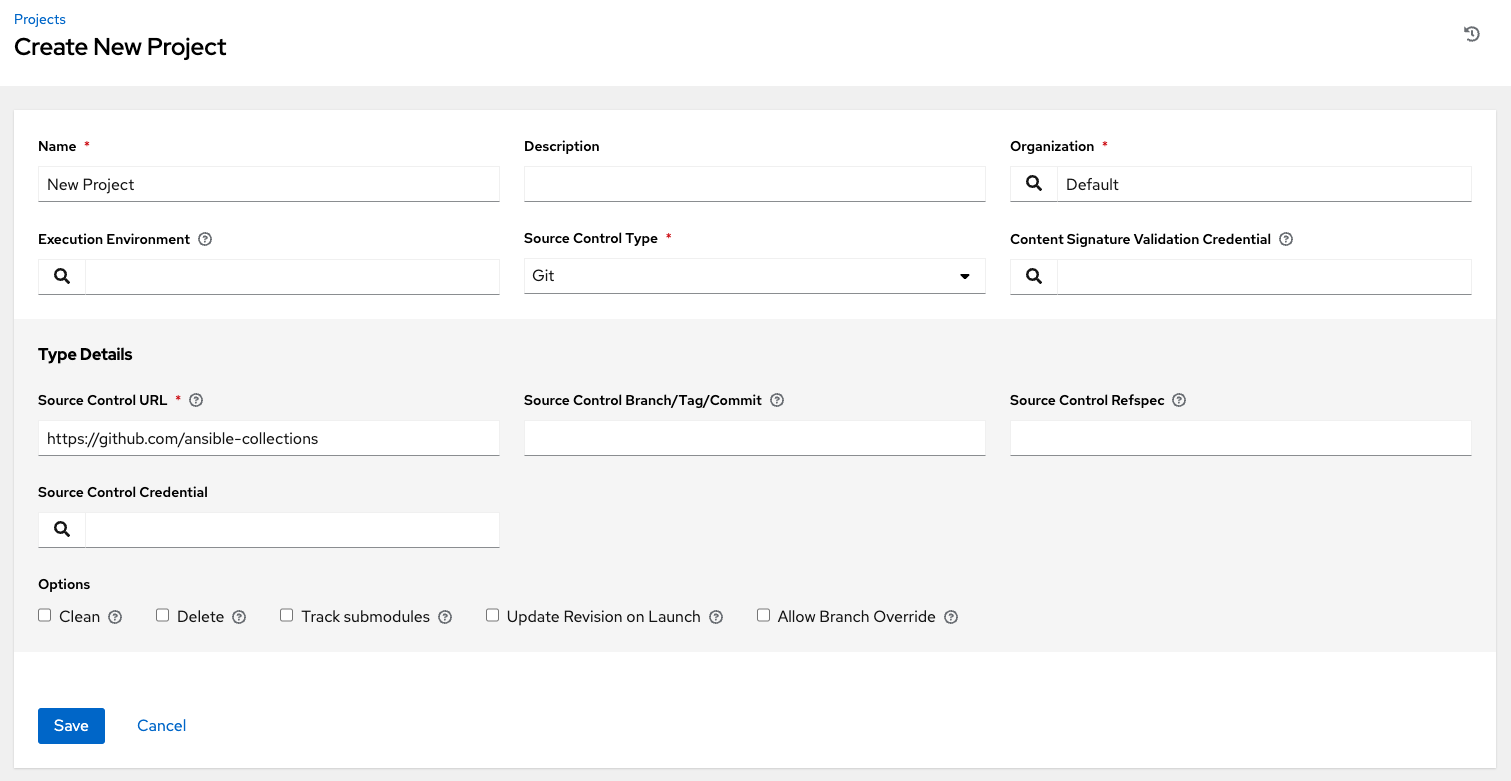
Click the Add button, which launches the Create Project window.
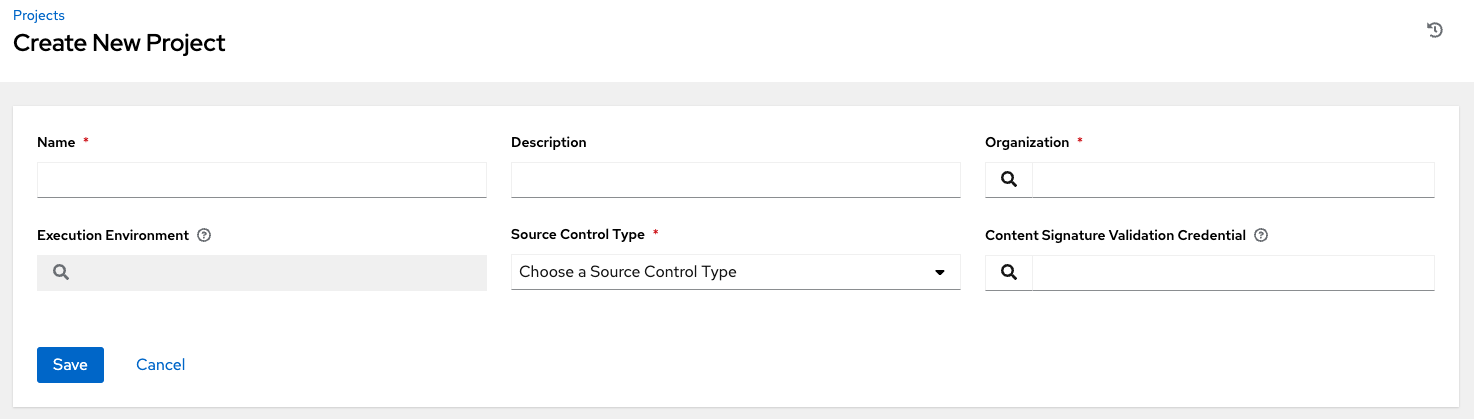
Enter the appropriate details into the following required fields:
Name
Description (optional)
Organization - A project must have at least one organization. Pick one organization now to create the project, and then after the project is created you can add additional organizations.
Execution Environment (optional) - Enter the name of the execution environment or search from a list of existing ones to run this project. See Upgrading to Execution Environments in the AWX Upgrade and Migration Guide for more information.
Source Control Type - Select from the drop-down menu list an SCM type associated with this project. The options in the subsequent section become available depend on the type you choose. Refer to Manage playbooks manually or Manage playbooks using source control in the subsequent sections for more detail.
Content Signature Validation Credential - Use this optional field to enable content verification. Specify the GPG key to use for validating content signature during project sync. If the content has been tampered with, the job will not run. See Project Signing and Verification for more detail.
Click Save when done.
The following describes ways projects are sourced in AWX:
15.1.1. Manage playbooks manually
Create one or more directories to store playbooks under the Project Base Path (for example, /var/lib/awx/projects/).
Create or copy playbook files into the playbook directory.
Ensure that the playbook directory and files are owned by the same UNIX user and group that the AWX service runs as.
Ensure that the permissions are appropriate for the playbook directories and files.
If adding a manual project, each project path inside of the project root folder can only be assigned to one project. If you receive the following message, ensure that you have not already assigned the project path to an existing project:
All of the project paths have been assigned to existing projects, or there are no directories found in the base path.You will need to add a project path before creating a new project.
If you have trouble adding a project path, check the permissions and SELinux context settings for the project directory and files.
Warning
If you have not added any Ansible playbook directories to the base project path, you will receive the following message:
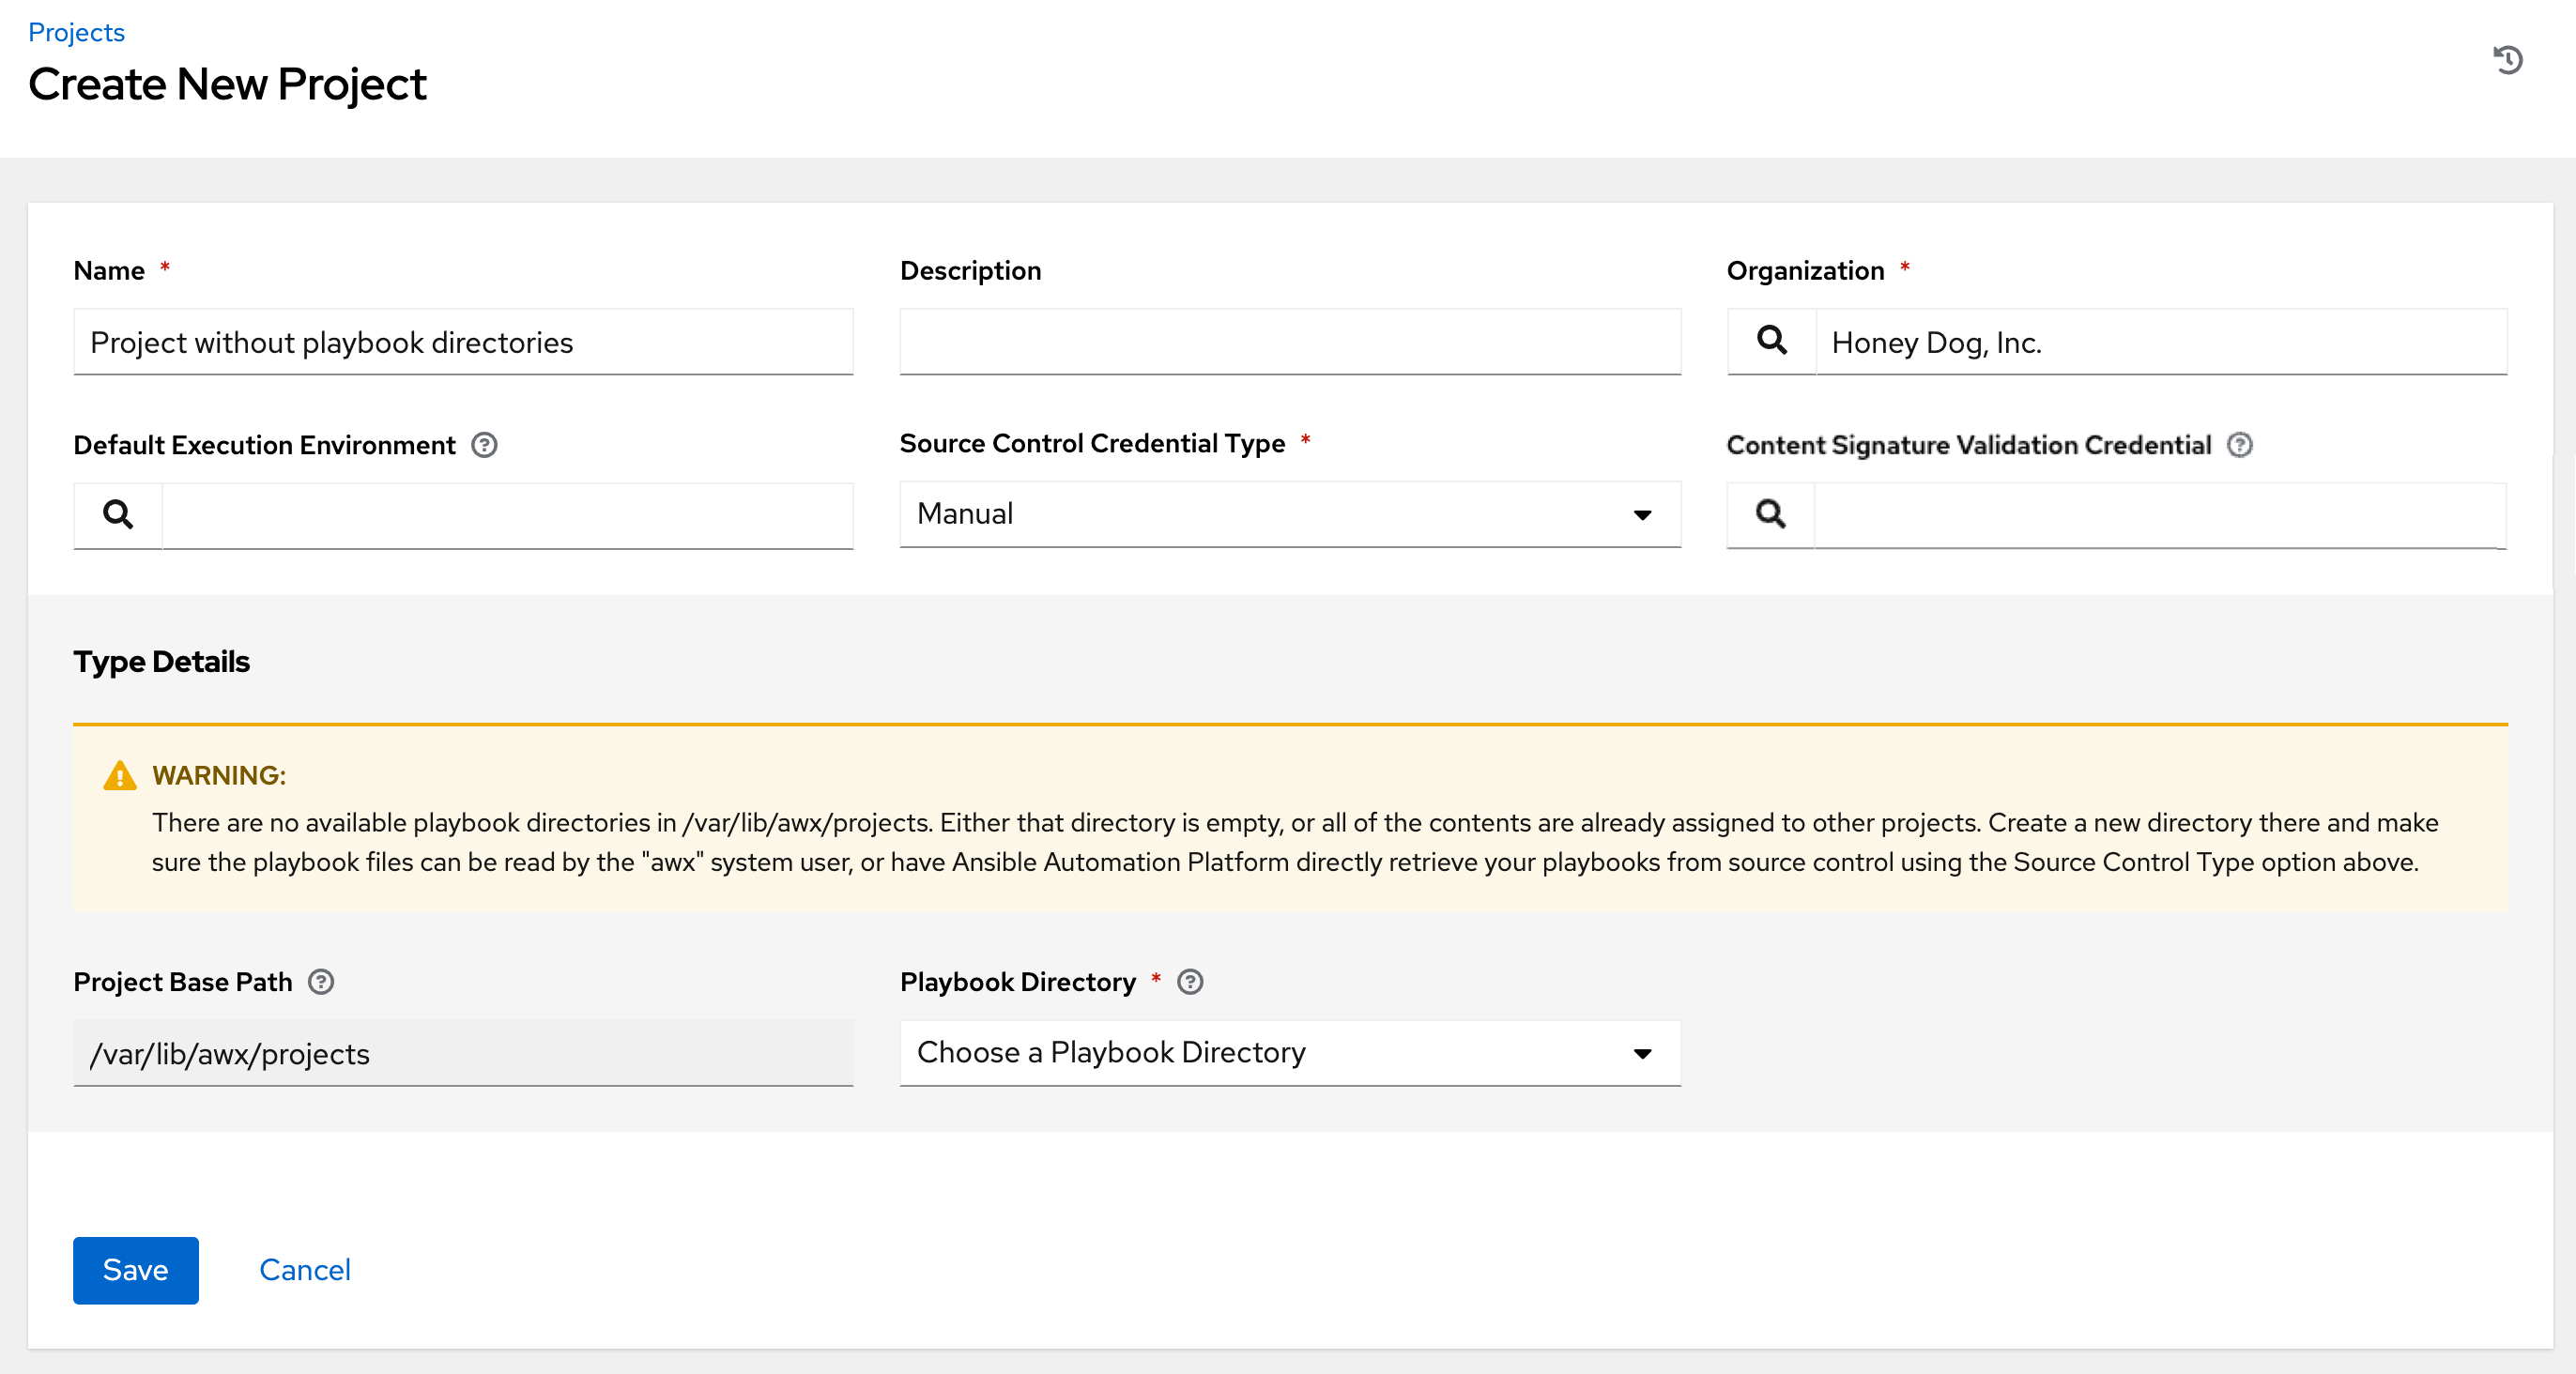
Correct this issue by creating the appropriate playbook directories and checking out playbooks from your SCM or otherwise copying playbooks into the appropriate playbook directories.
15.1.2. Manage playbooks using source control
15.1.2.1. SCM Types - Git and Subversion
To configure playbooks to use source control, in the Project Details tab:
Select the appropriate option (Git or Subversion) from the SCM Type drop-down menu list.
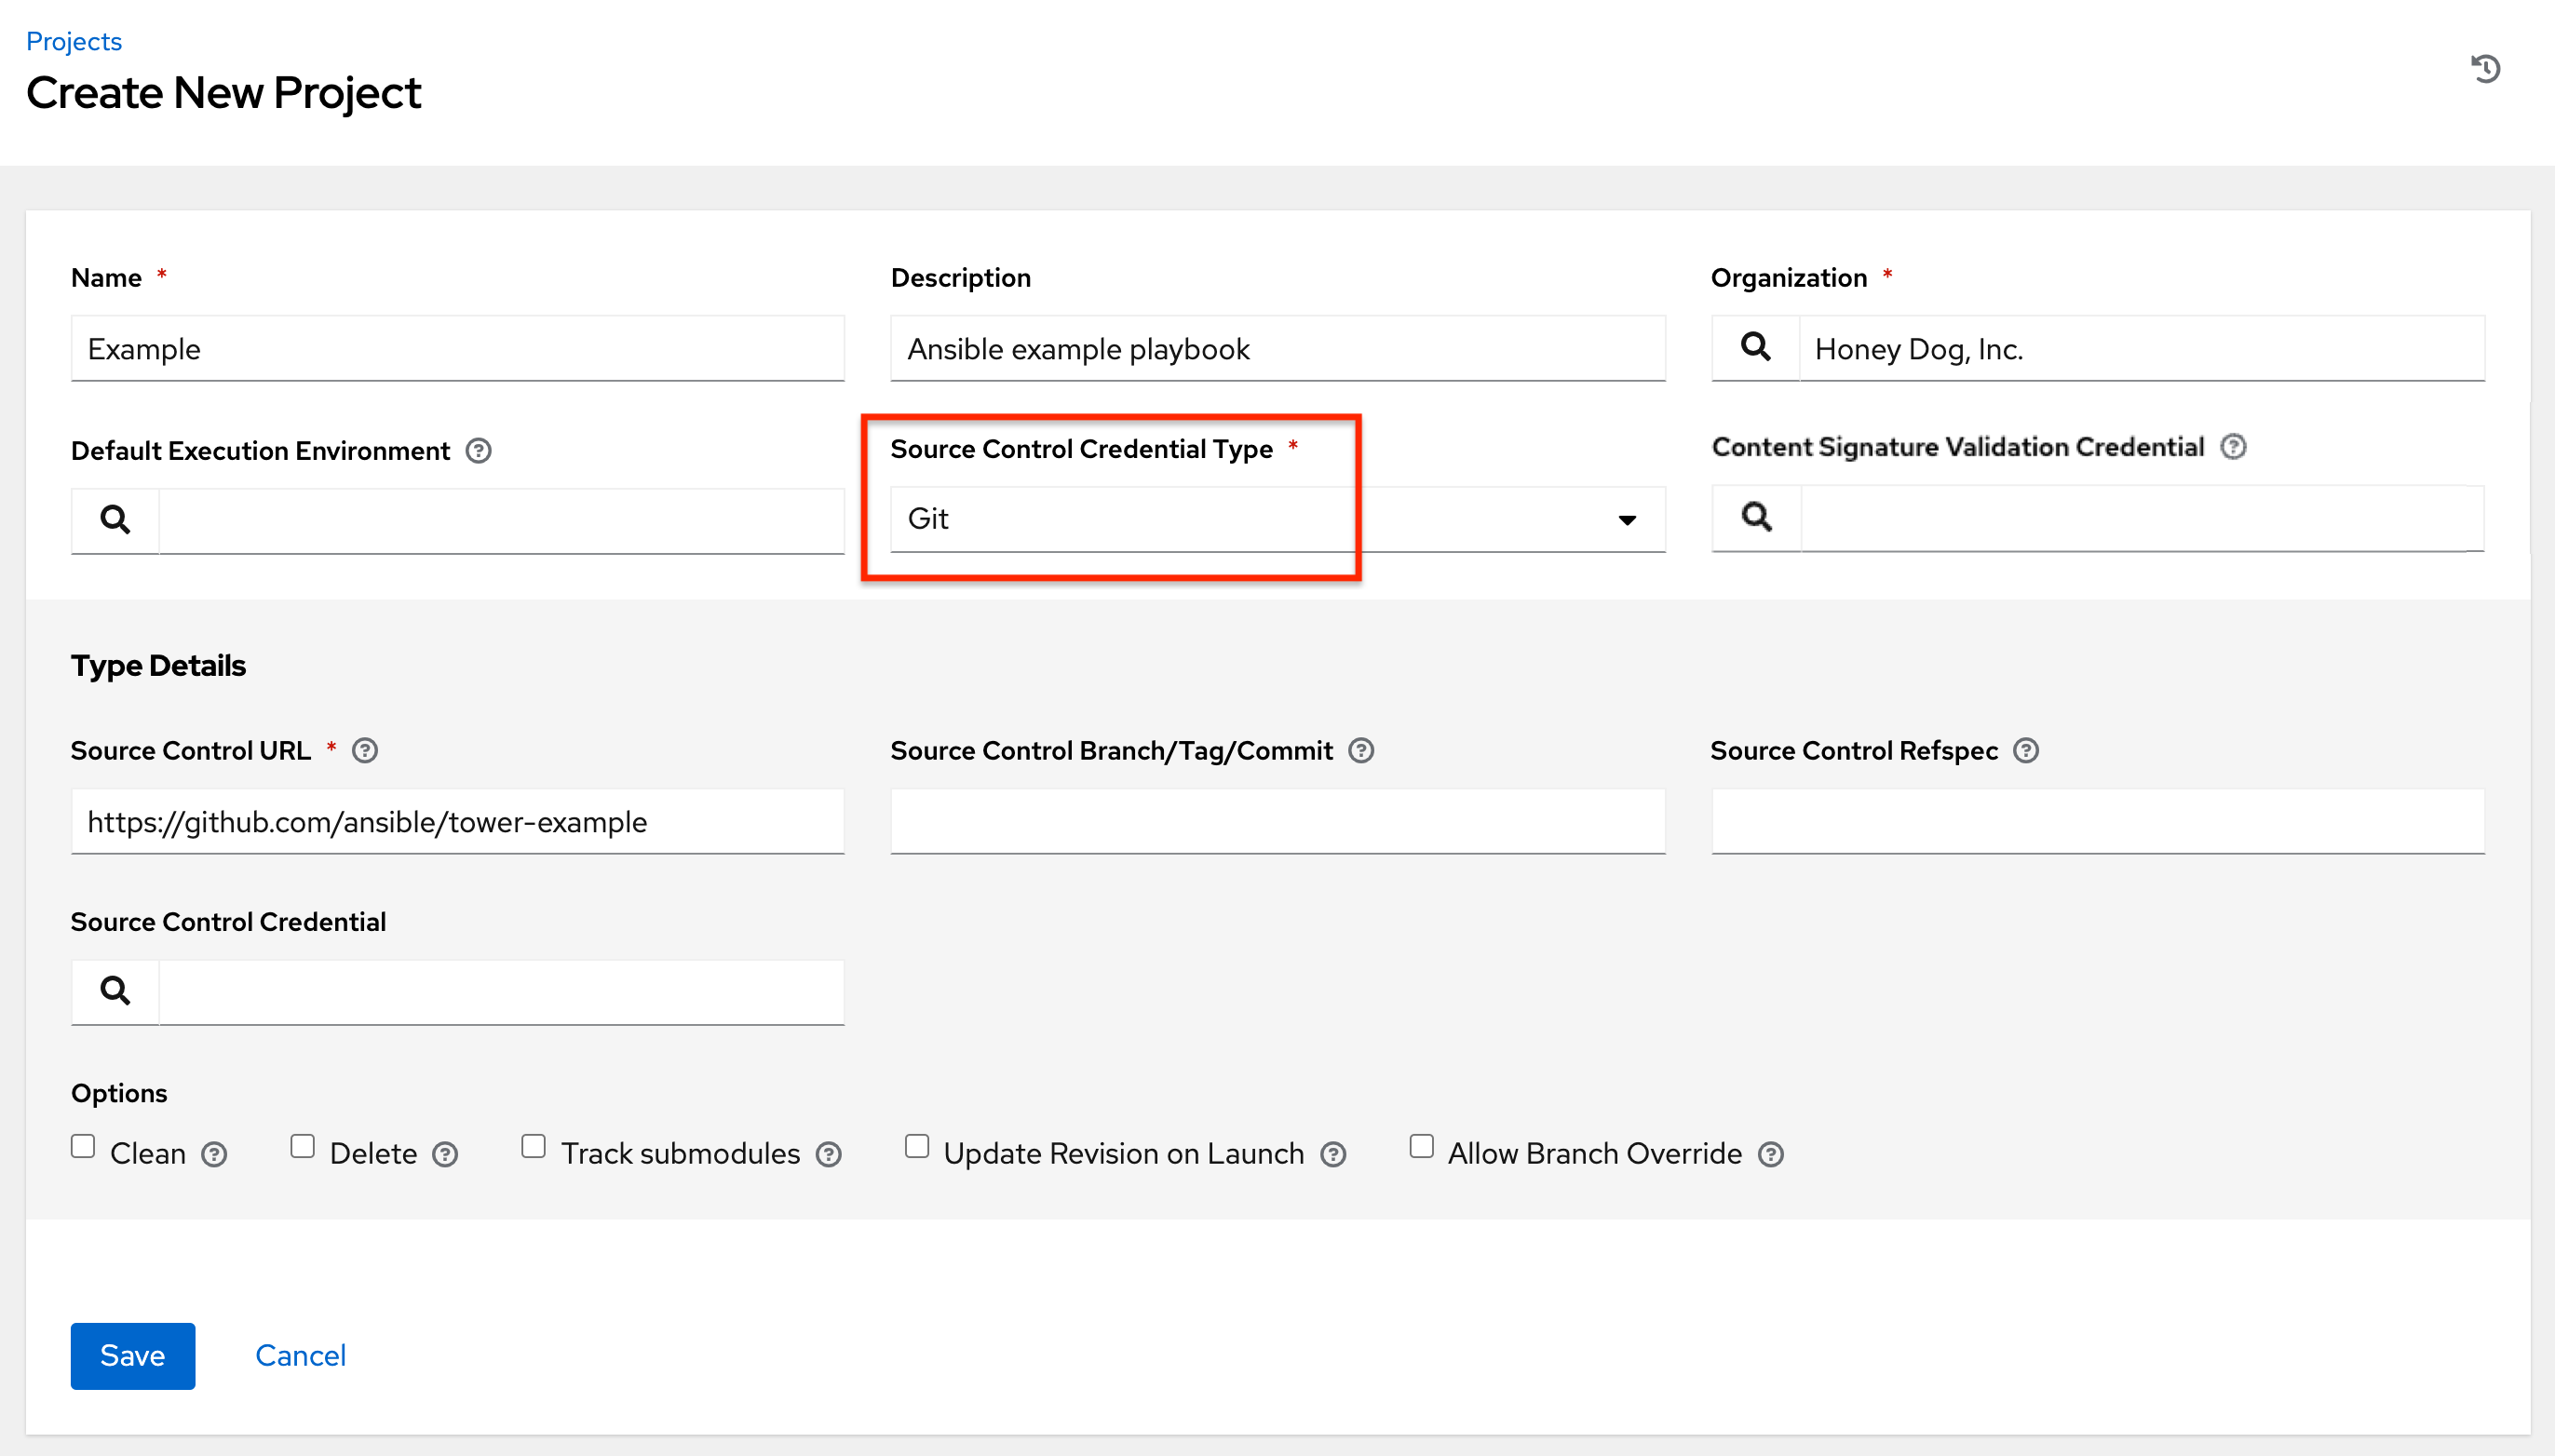
Enter the appropriate details into the following fields:
SCM URL - See an example in the tooltip
.
SCM Branch/Tag/Commit - Optionally enter the SCM branch, tags, commit hashes, arbitrary refs, or revision number (if applicable) from the source control (Git or Subversion) to checkout. Some commit hashes and refs may not be available unless you also provide a custom refspec in the next field. If left blank, the default is HEAD which is the last checked out Branch/Tag/Commit for this project.
SCM Refspec - This field is an option specific to git source control and only advanced users familiar and comfortable with git should specify which references to download from the remote repository. For more detail, see job branch overriding.
Source Control Credential - If authentication is required, select the appropriate source control credential
In the SCM Update Options, optionally select the launch behavior, if applicable.
Clean - Removes any local modifications prior to performing an update.
Delete - Deletes the local repository in its entirety prior to performing an update. Depending on the size of the repository this may significantly increase the amount of time required to complete an update.
Track submodules - Tracks the latest commit. See more details in the tooltip
Update Revision on Launch - Updates the revision of the project to the current revision in the remote source control, as well as cache the roles directory from Galaxy or Collections. AWX ensures that the local revision matches and that the roles and collections are up-to-date with the last update. Also, to avoid job overflows if jobs are spawned faster than the project can sync, selecting this allows you to configure a Cache Timeout to cache prior project syncs for a certain number of seconds.
Allow Branch Override - Allows a job template or an inventory source that uses this project to launch with a specified SCM branch or revision other than that of the project’s. For more detail, see job branch overriding.

Click Save to save your project.
Tip
Using a GitHub link offers an easy way to use a playbook. To help get you started, use the
helloworld.ymlfile available at: https://github.com/ansible/tower-example.gitThis link offers a very similar playbook to the one created manually in the instructions found in the AWX Quickstart. Using it will not alter or harm your system in anyway.
15.1.2.2. SCM Type - Red Hat Insights
To configure playbooks to use Red Hat Insights, in the Project Details tab:
Select Red Hat Insights from the SCM Type drop-down menu list.
Red Hat Insights requires a credential for authentication. Select from the Credential field the appropriate credential for use with Insights.
In the SCM Update Options, optionally select the launch behavior, if applicable.
Clean - Removes any local modifications prior to performing an update.
Delete - Deletes the local repository in its entirety prior to performing an update. Depending on the size of the repository this may significantly increase the amount of time required to complete an update.
Update Revision on Launch - Updates the revision of the project to the current revision in the remote source control, as well as cache the roles directory from Galaxy or Collections. AWX ensures that the local revision matches and that the roles and collections are up-to-date with the last update. Also, to avoid job overflows if jobs are spawned faster than the project can sync, selecting this allows you to configure a Cache Timeout to cache prior project syncs for a certain number of seconds.

Click Save to save your project.
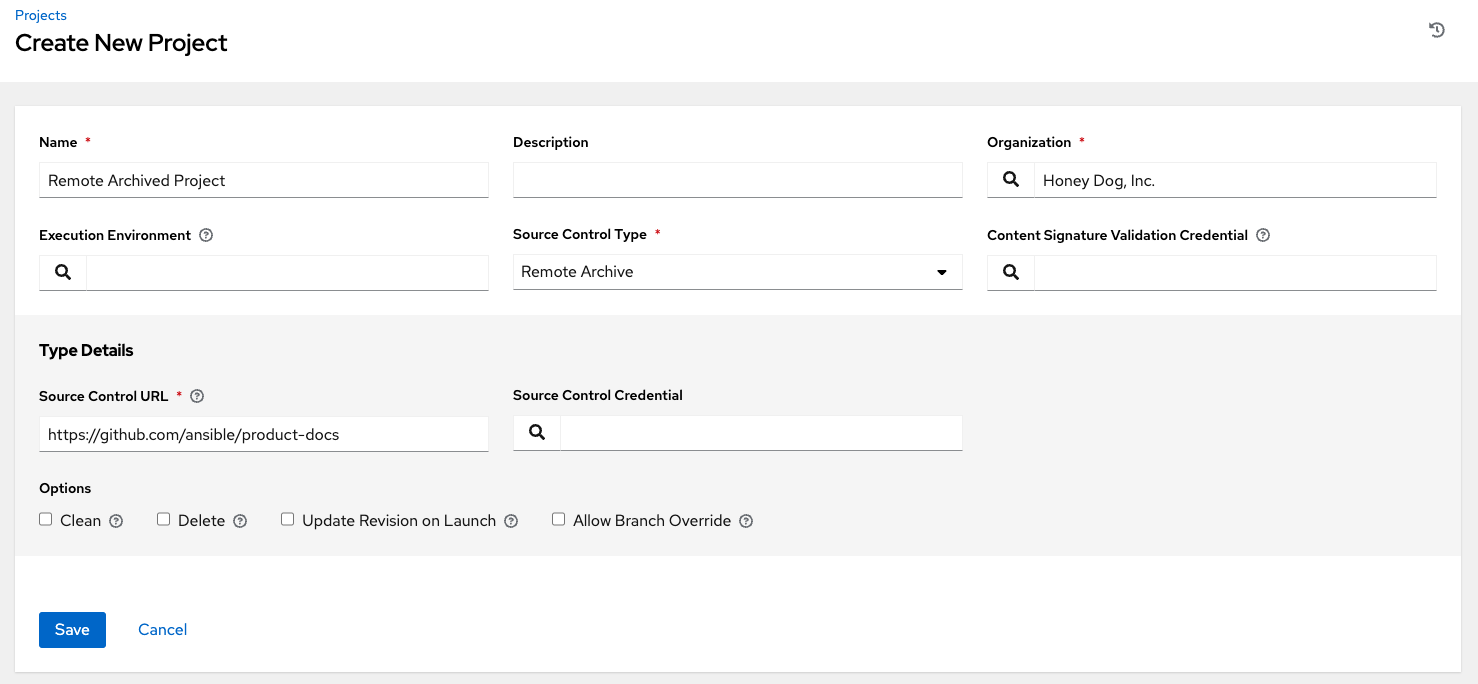
15.1.2.3. SCM Type - Remote Archive
Playbooks using a remote archive allow projects to be provided based on a build process that produces a versioned artifact, or release, containing all the requirements for that project in a single archive.
To configure playbooks to use a remote archive, in the Project Details tab:
Select Remote Archive from the SCM Type drop-down menu list.
Enter the appropriate details into the following fields:
SCM URL - requires a URL to a remote archive, such as a GitHub Release or a build artifact stored in Artifactory and unpacks it into the project path for use
SCM Credential - If authentication is required, select the appropriate SCM credential
In the SCM Update Options, optionally select the launch behavior, if applicable.
Clean - Removes any local modifications prior to performing an update.
Delete - Deletes the local repository in its entirety prior to performing an update. Depending on the size of the repository this may significantly increase the amount of time required to complete an update.
Update Revision on Launch - Not recommended, as this option updates the revision of the project to the current revision in the remote source control, as well as cache the roles directory from Galaxy or Collections.
Allow Branch Override - Not recommended, as this option allows a job template that uses this project to launch with a specified SCM branch or revision other than that of the project’s.
Note
Since this SCM type is intended to support the concept of unchanging artifacts, it is advisable to disable Galaxy integration (for roles, at minimum).
Click Save to save your project.
15.2. Updating projects from source control
Update an existing SCM-based project by selecting the project and clicking the
button.
Note
Please note that immediately after adding a project setup to use source control, a “Sync” starts that fetches the project details from the configured source control.
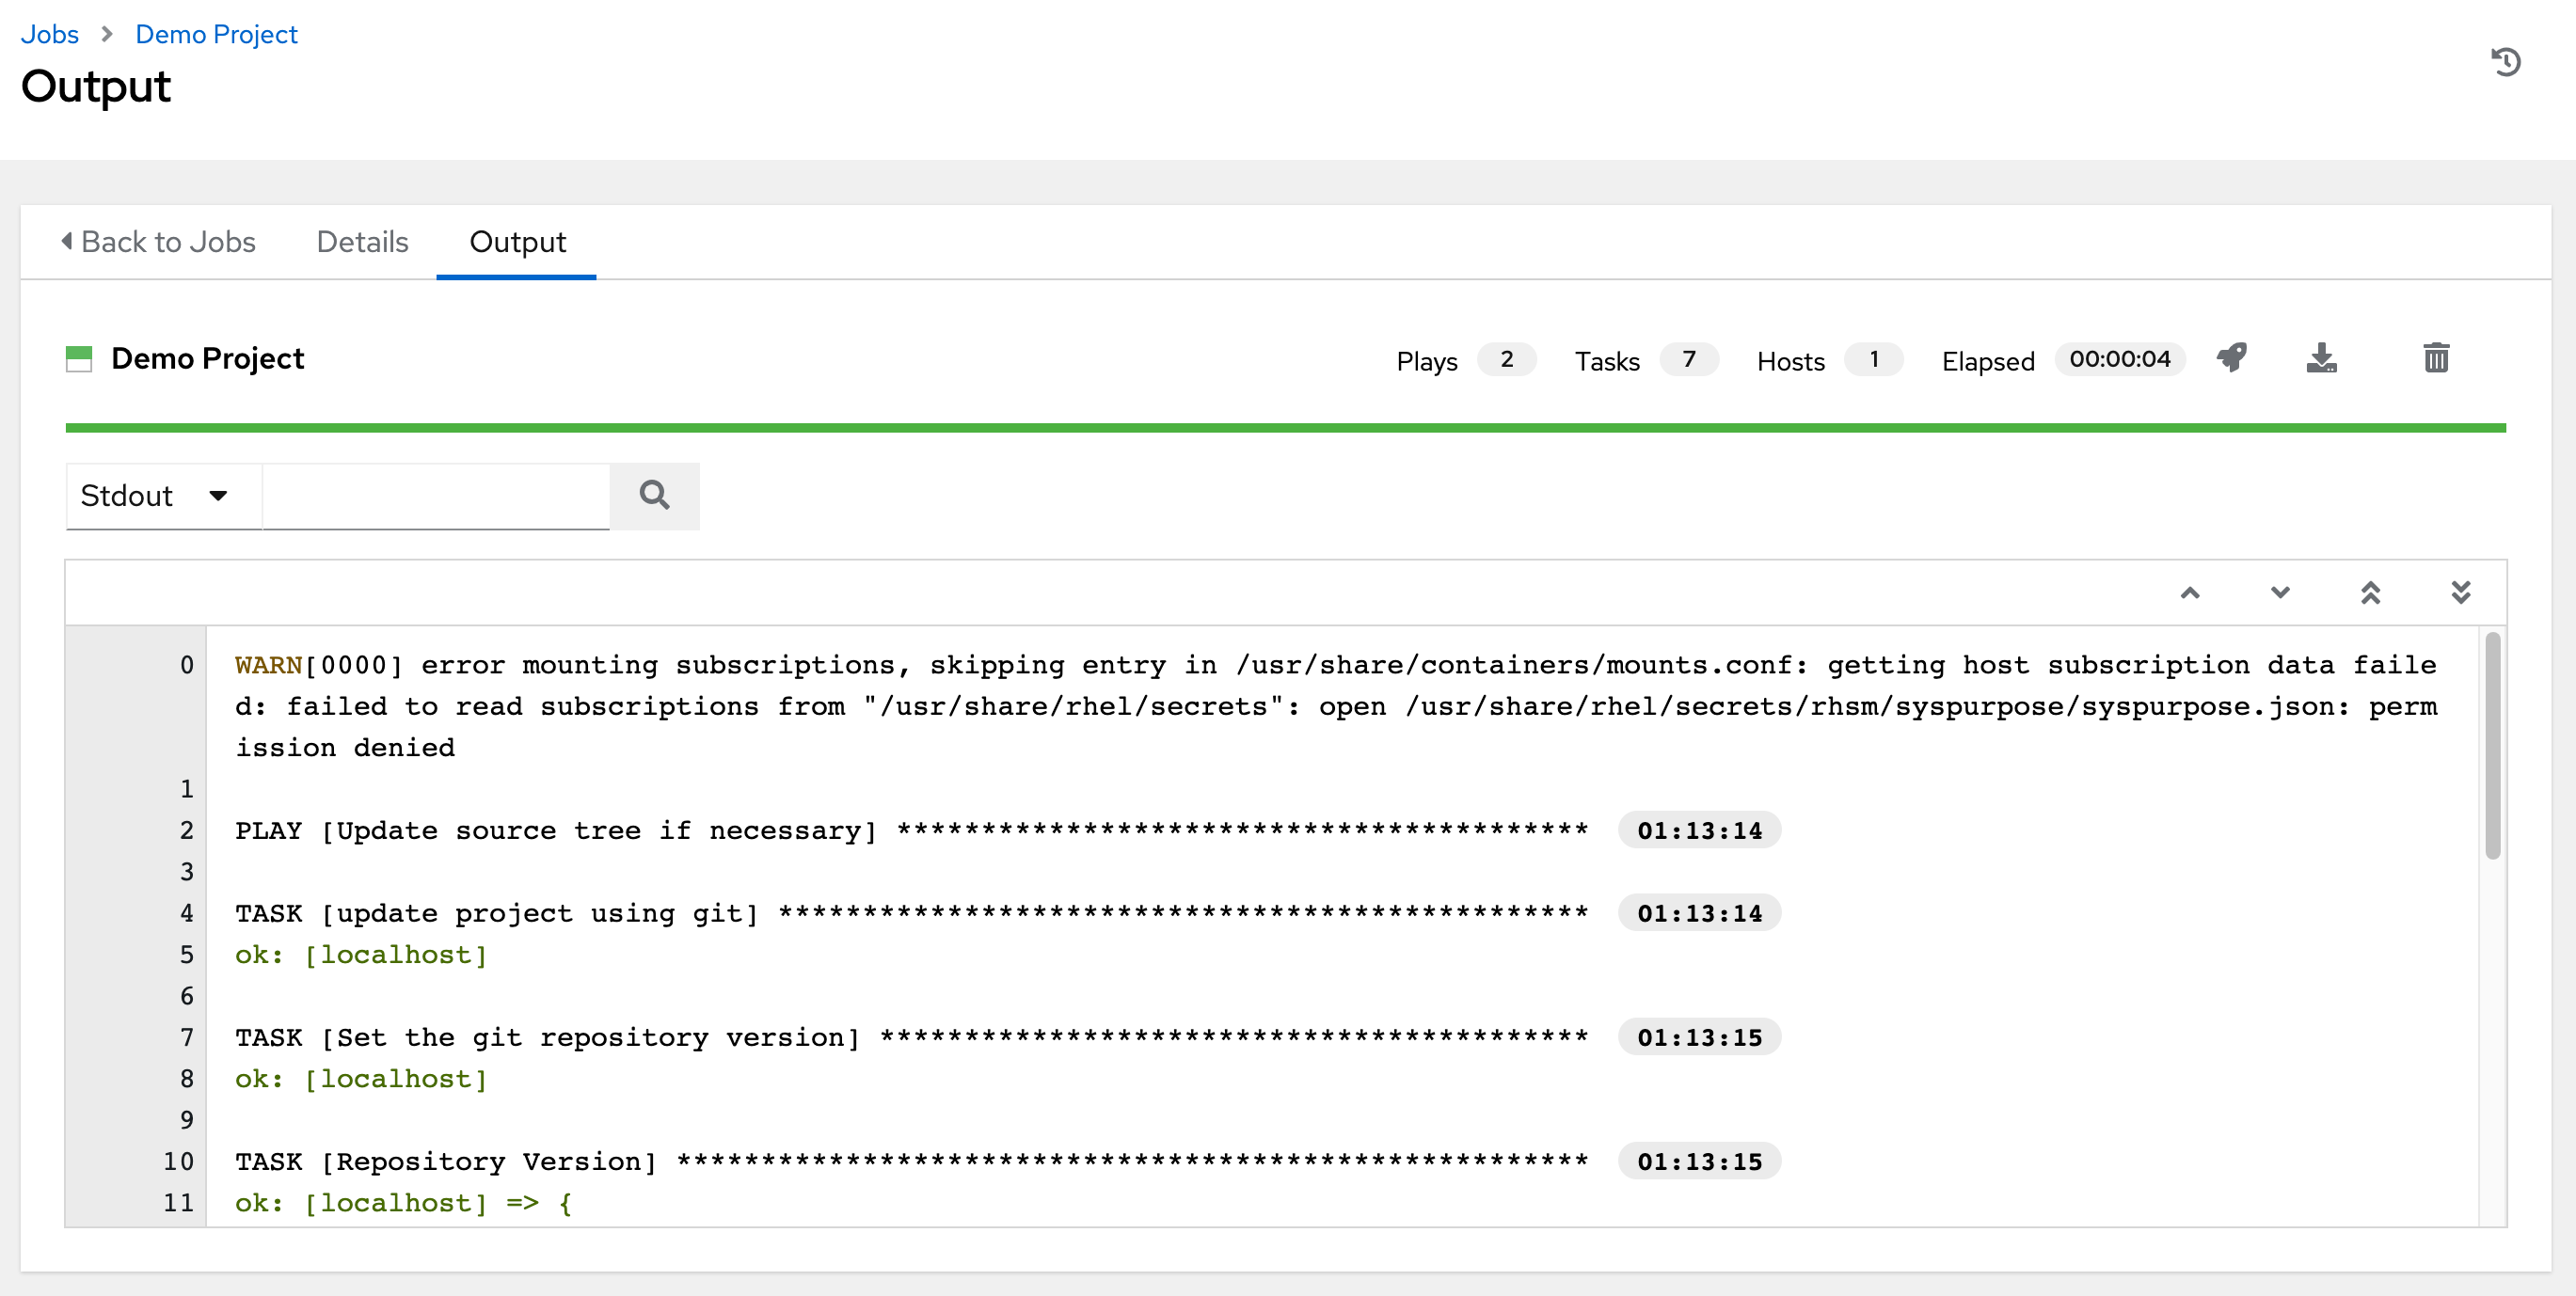
Click on project’s status under the Status column to get further details about the update process.
15.3. Work with Permissions
The set of permissions assigned to this project (role-based access controls) that provide the ability to read, modify, and administer projects, inventories, job templates, and other AWX elements are Privileges.
You can access the project permissions via the Access tab next to the Details tab. This screen displays a list of users that currently have permissions to this project. The list may be sorted and searched by Username, First Name, or Last Name.
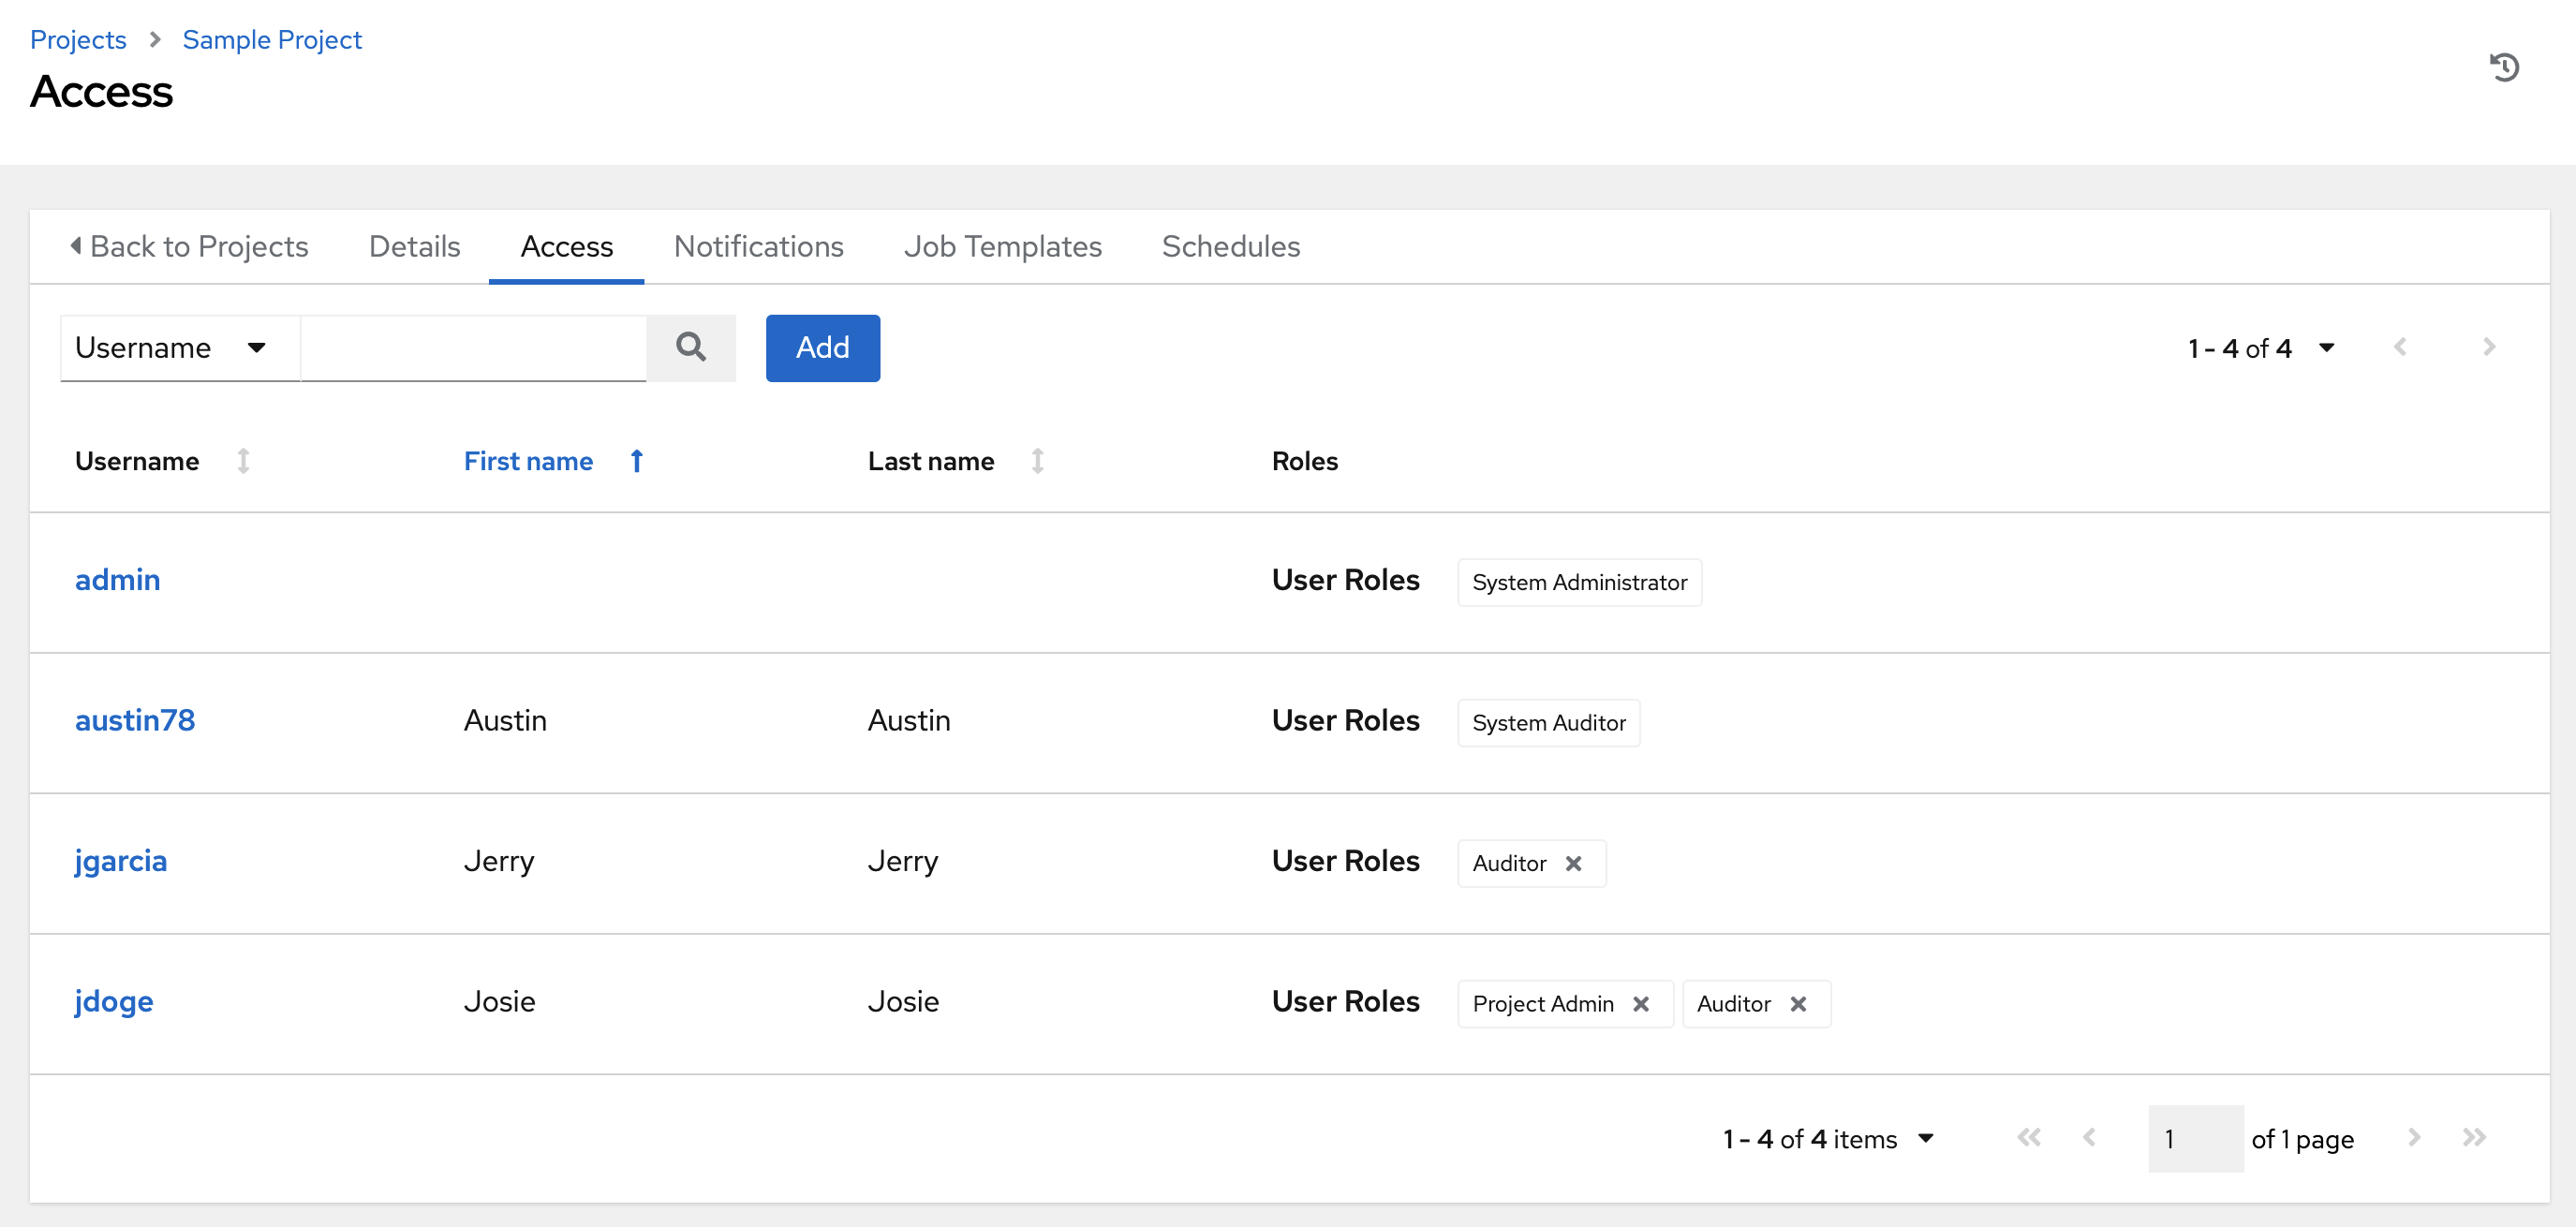
15.3.1. Add Permissions
In the Access tab, click the Add button.
Select a user or team to add and click Next
Select one or more users or teams from the list by clicking the check box(es) next to the name(s) to add them as members and click Next.
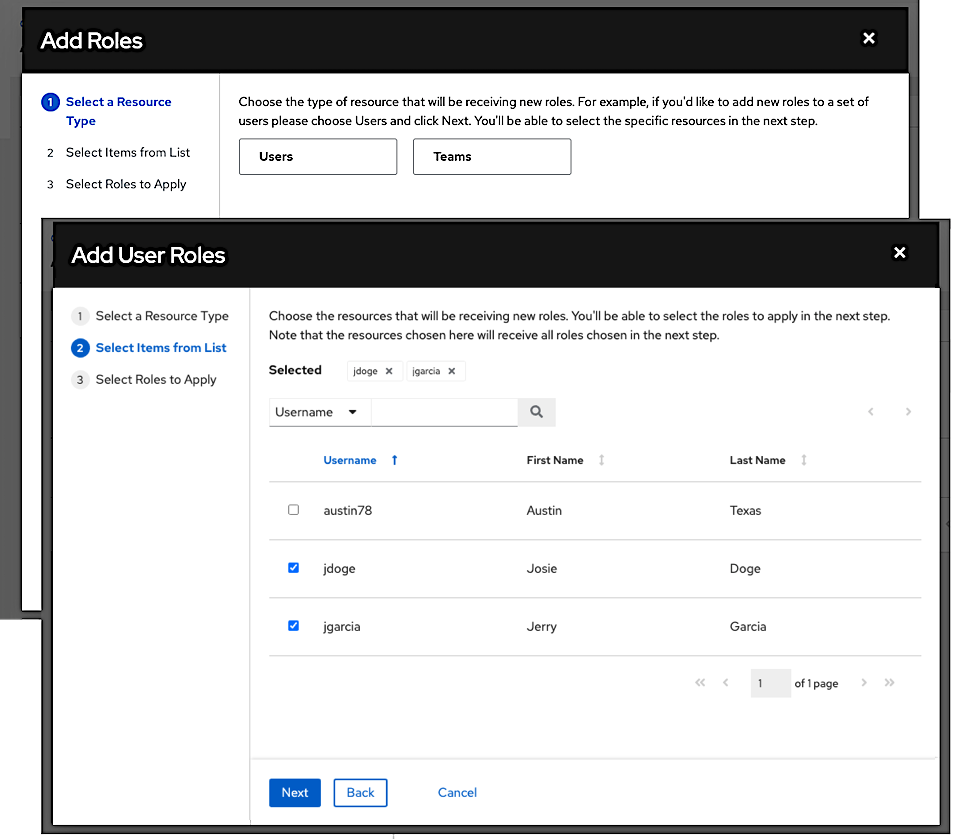
In this example, two users have been selected to be added.
Select the role(s) you want the selected user(s) or team(s) to have. Be sure to scroll down for a complete list of roles. Different resources have different options available.
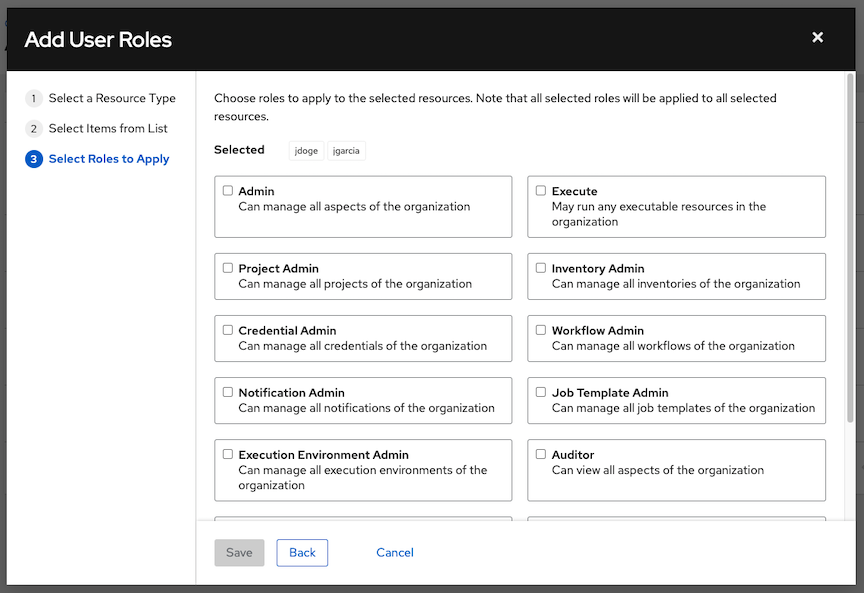
Click the Save button to apply the roles to the selected user(s) or team(s) and to add them as members.
The Add Users/Teams window closes to display the updated roles assigned for each user and team.
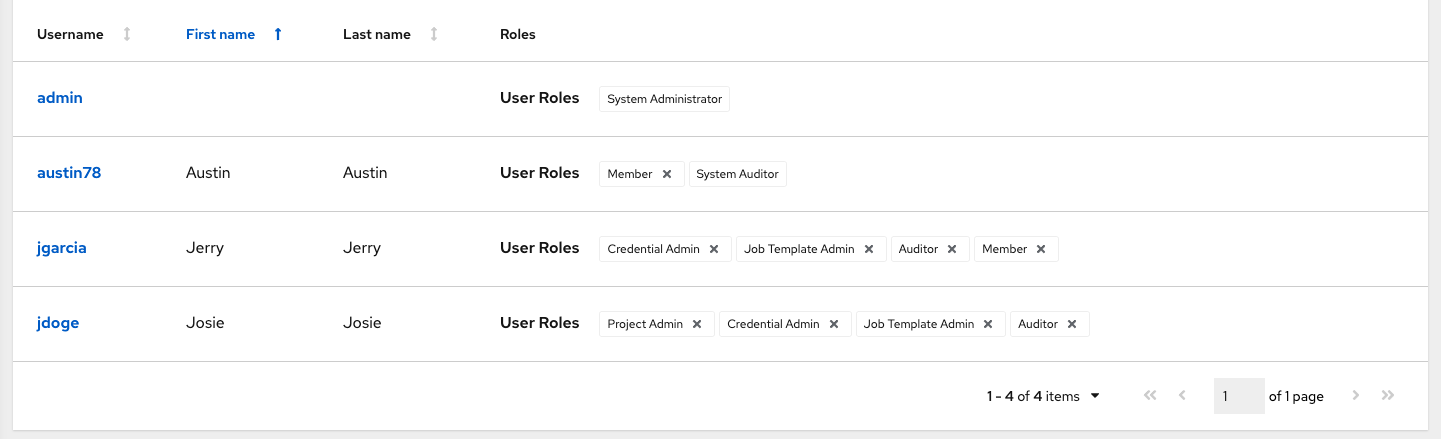
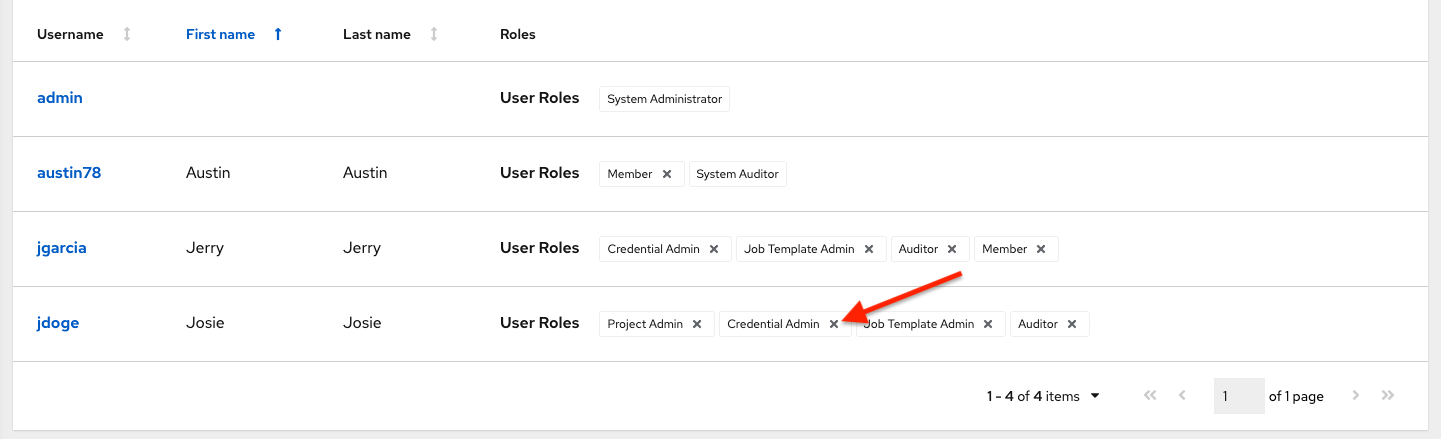
To remove roles for a particular user, click the disassociate (x) button next to its resource.
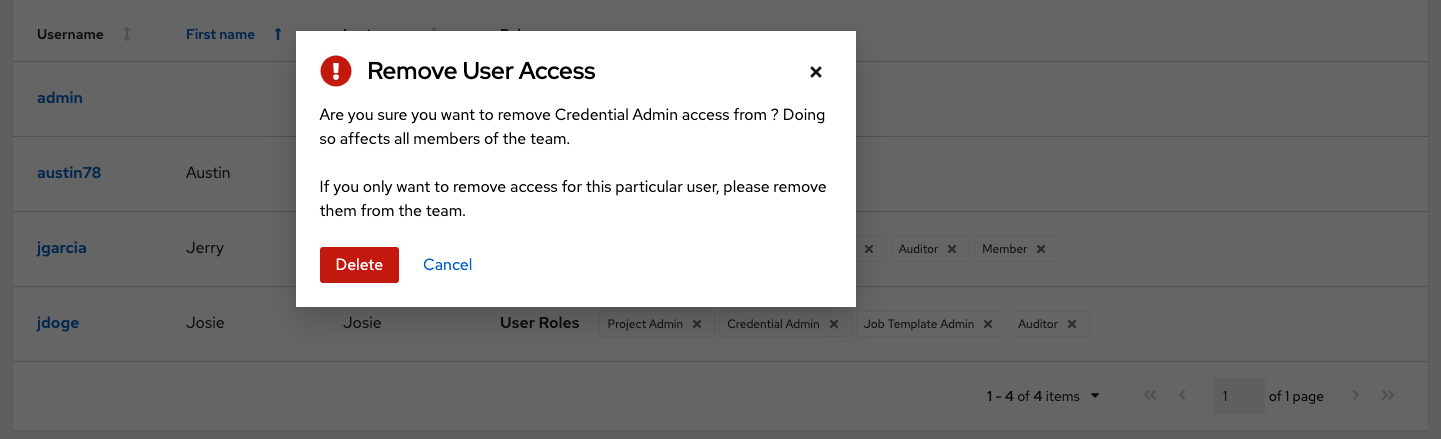
This launches a confirmation dialog, asking you to confirm the disassociation.
15.4. Work with Notifications
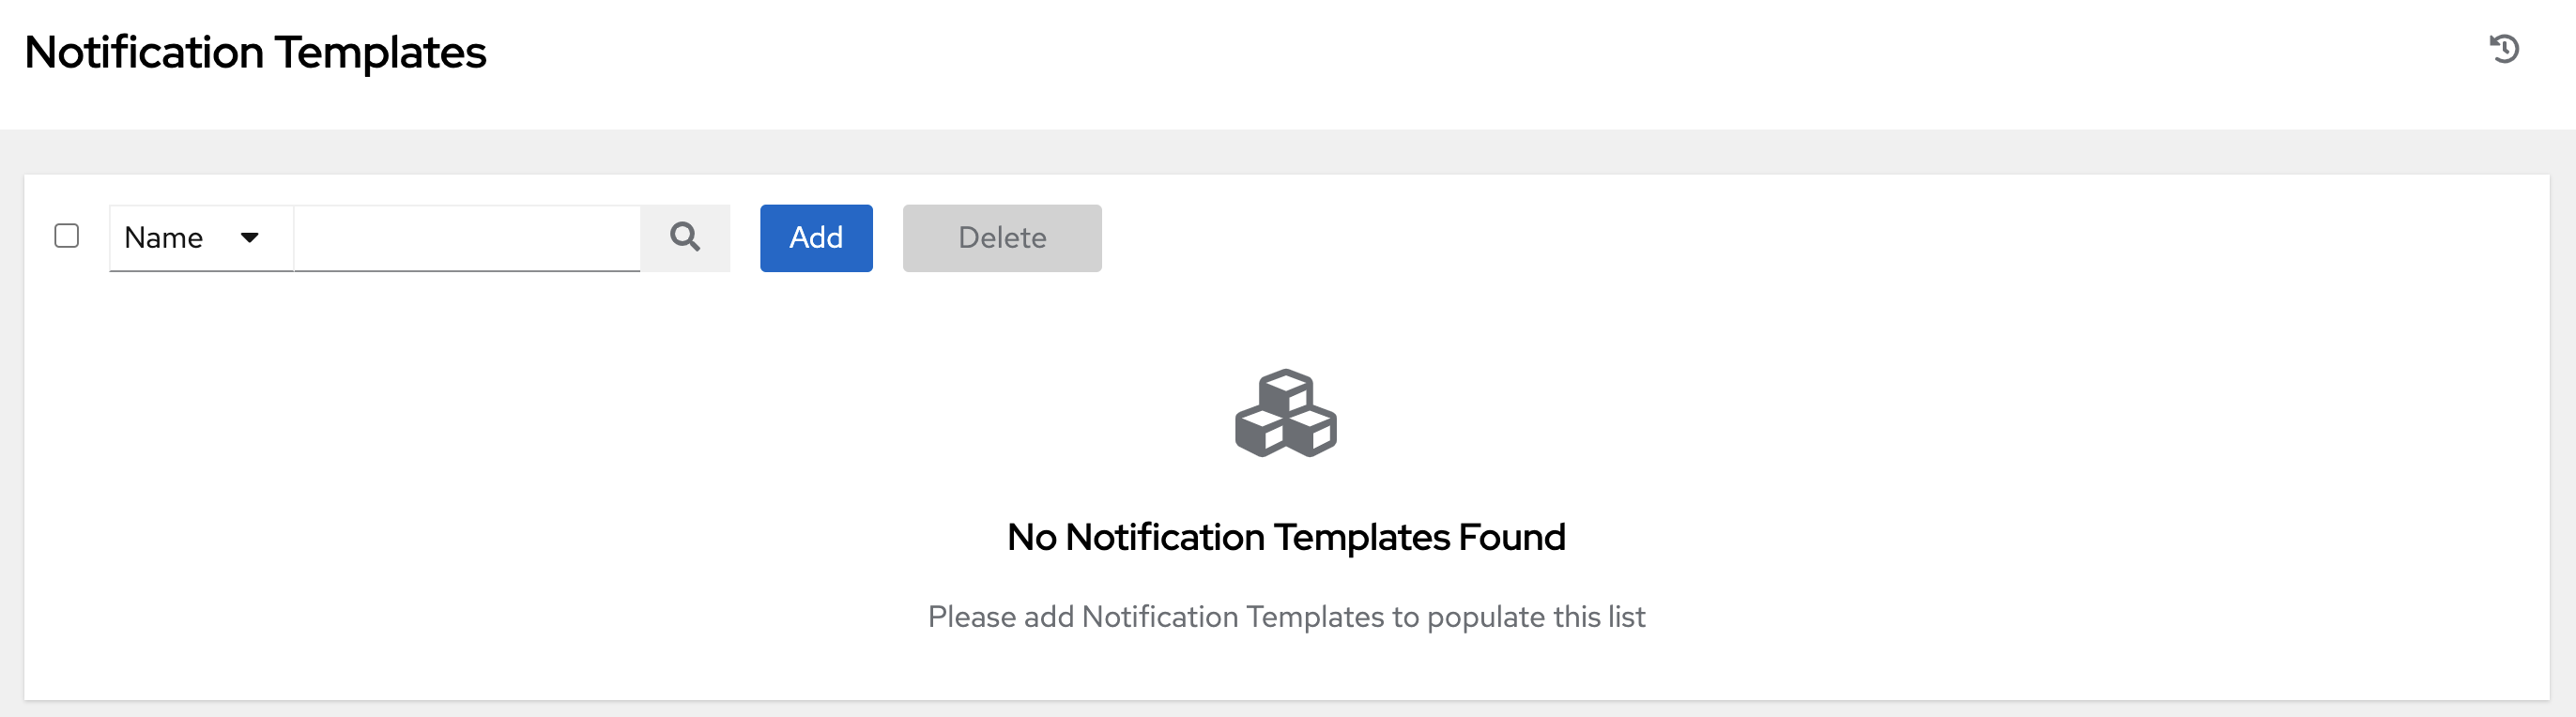
Clicking the Notifications tab allows you to review any notification integrations you have setup.
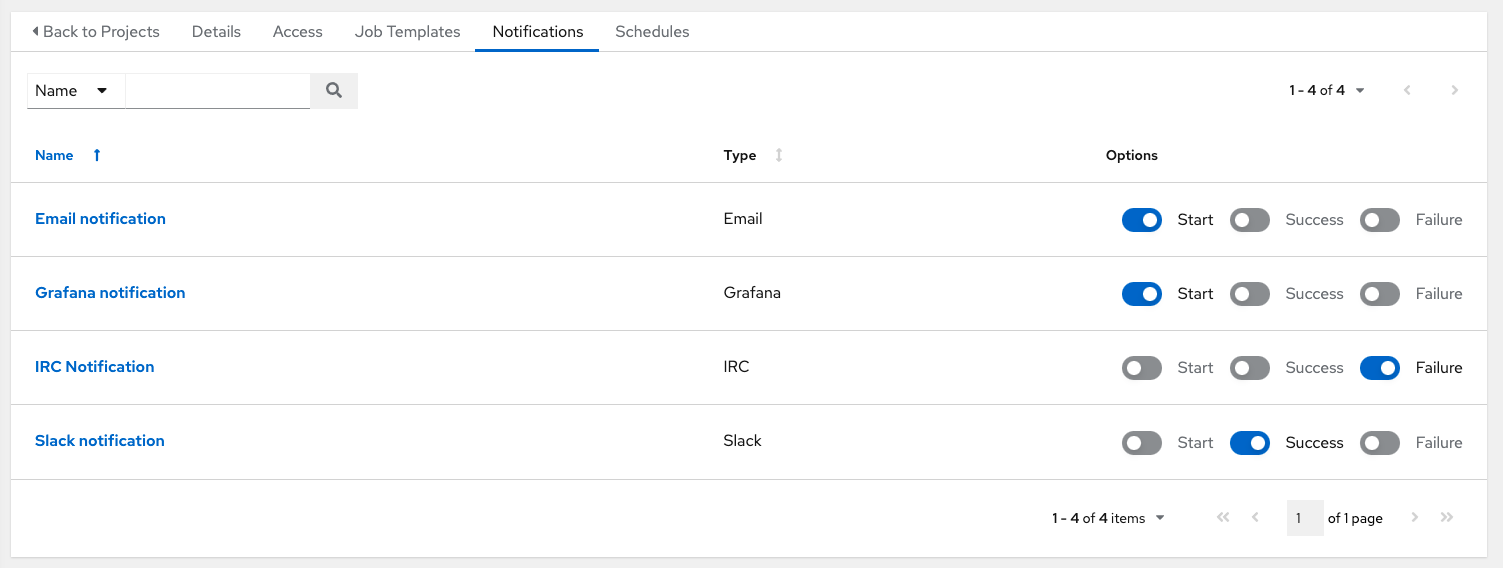
Use the toggles to enable or disable the notifications to use with your particular project. For more detail, see Enable and Disable Notifications.
If no notifications have been set up, you can configure them from the Notifications link from the left navigation bar to create a new notification.
Refer to Notification Types for additional details on configuring various notification types.
15.5. Work with Job Templates
Clicking on Job Templates allows you to add and review any job templates or workflow templates associated with this project.
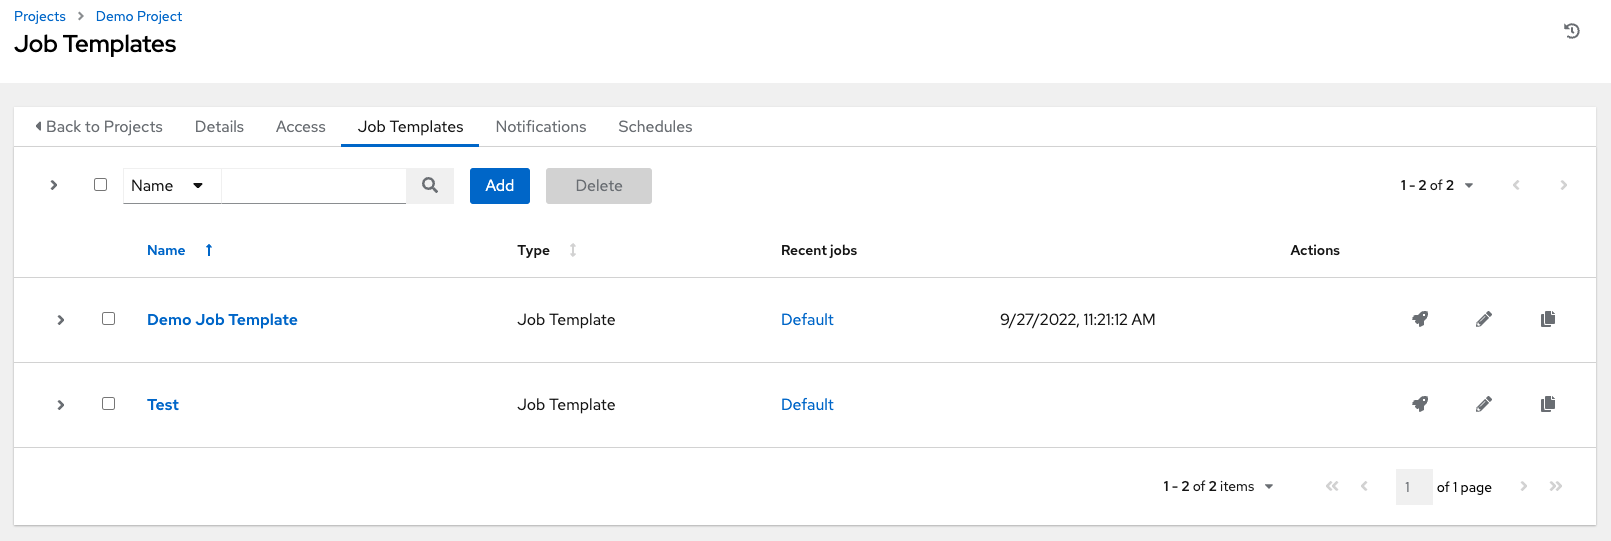
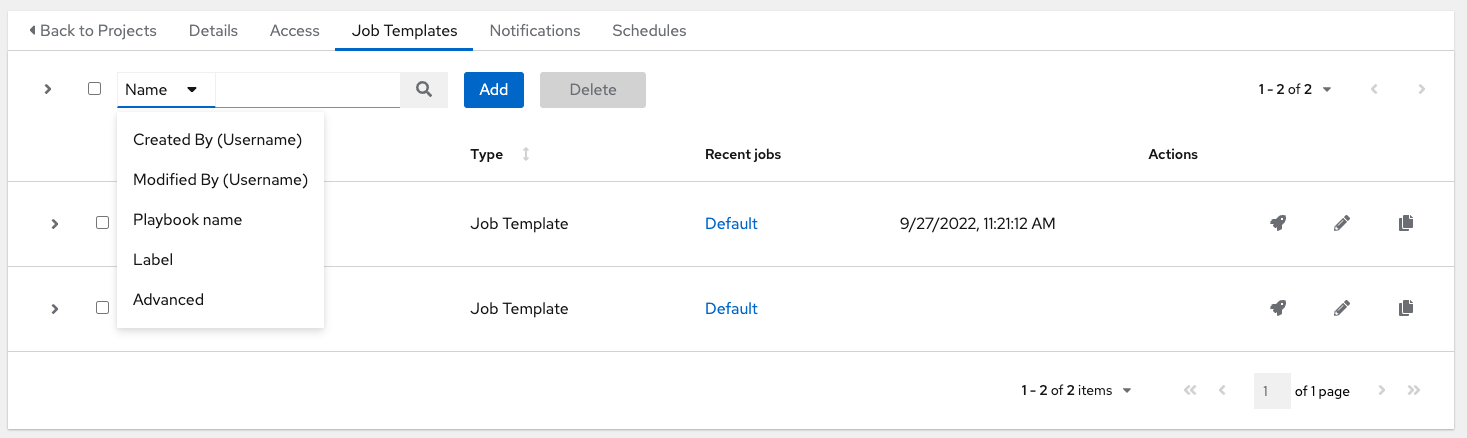
Click on the recent jobs that ran using that template to see its details and other useful information. You can sort this list by various criteria, and perform a search to filter the templates of interest.
From this view, you can also launch ( ), edit (), or copy () the template configuration.
15.6. Work with Schedules
Clicking on Schedules allows you to review any schedules set up for this project.
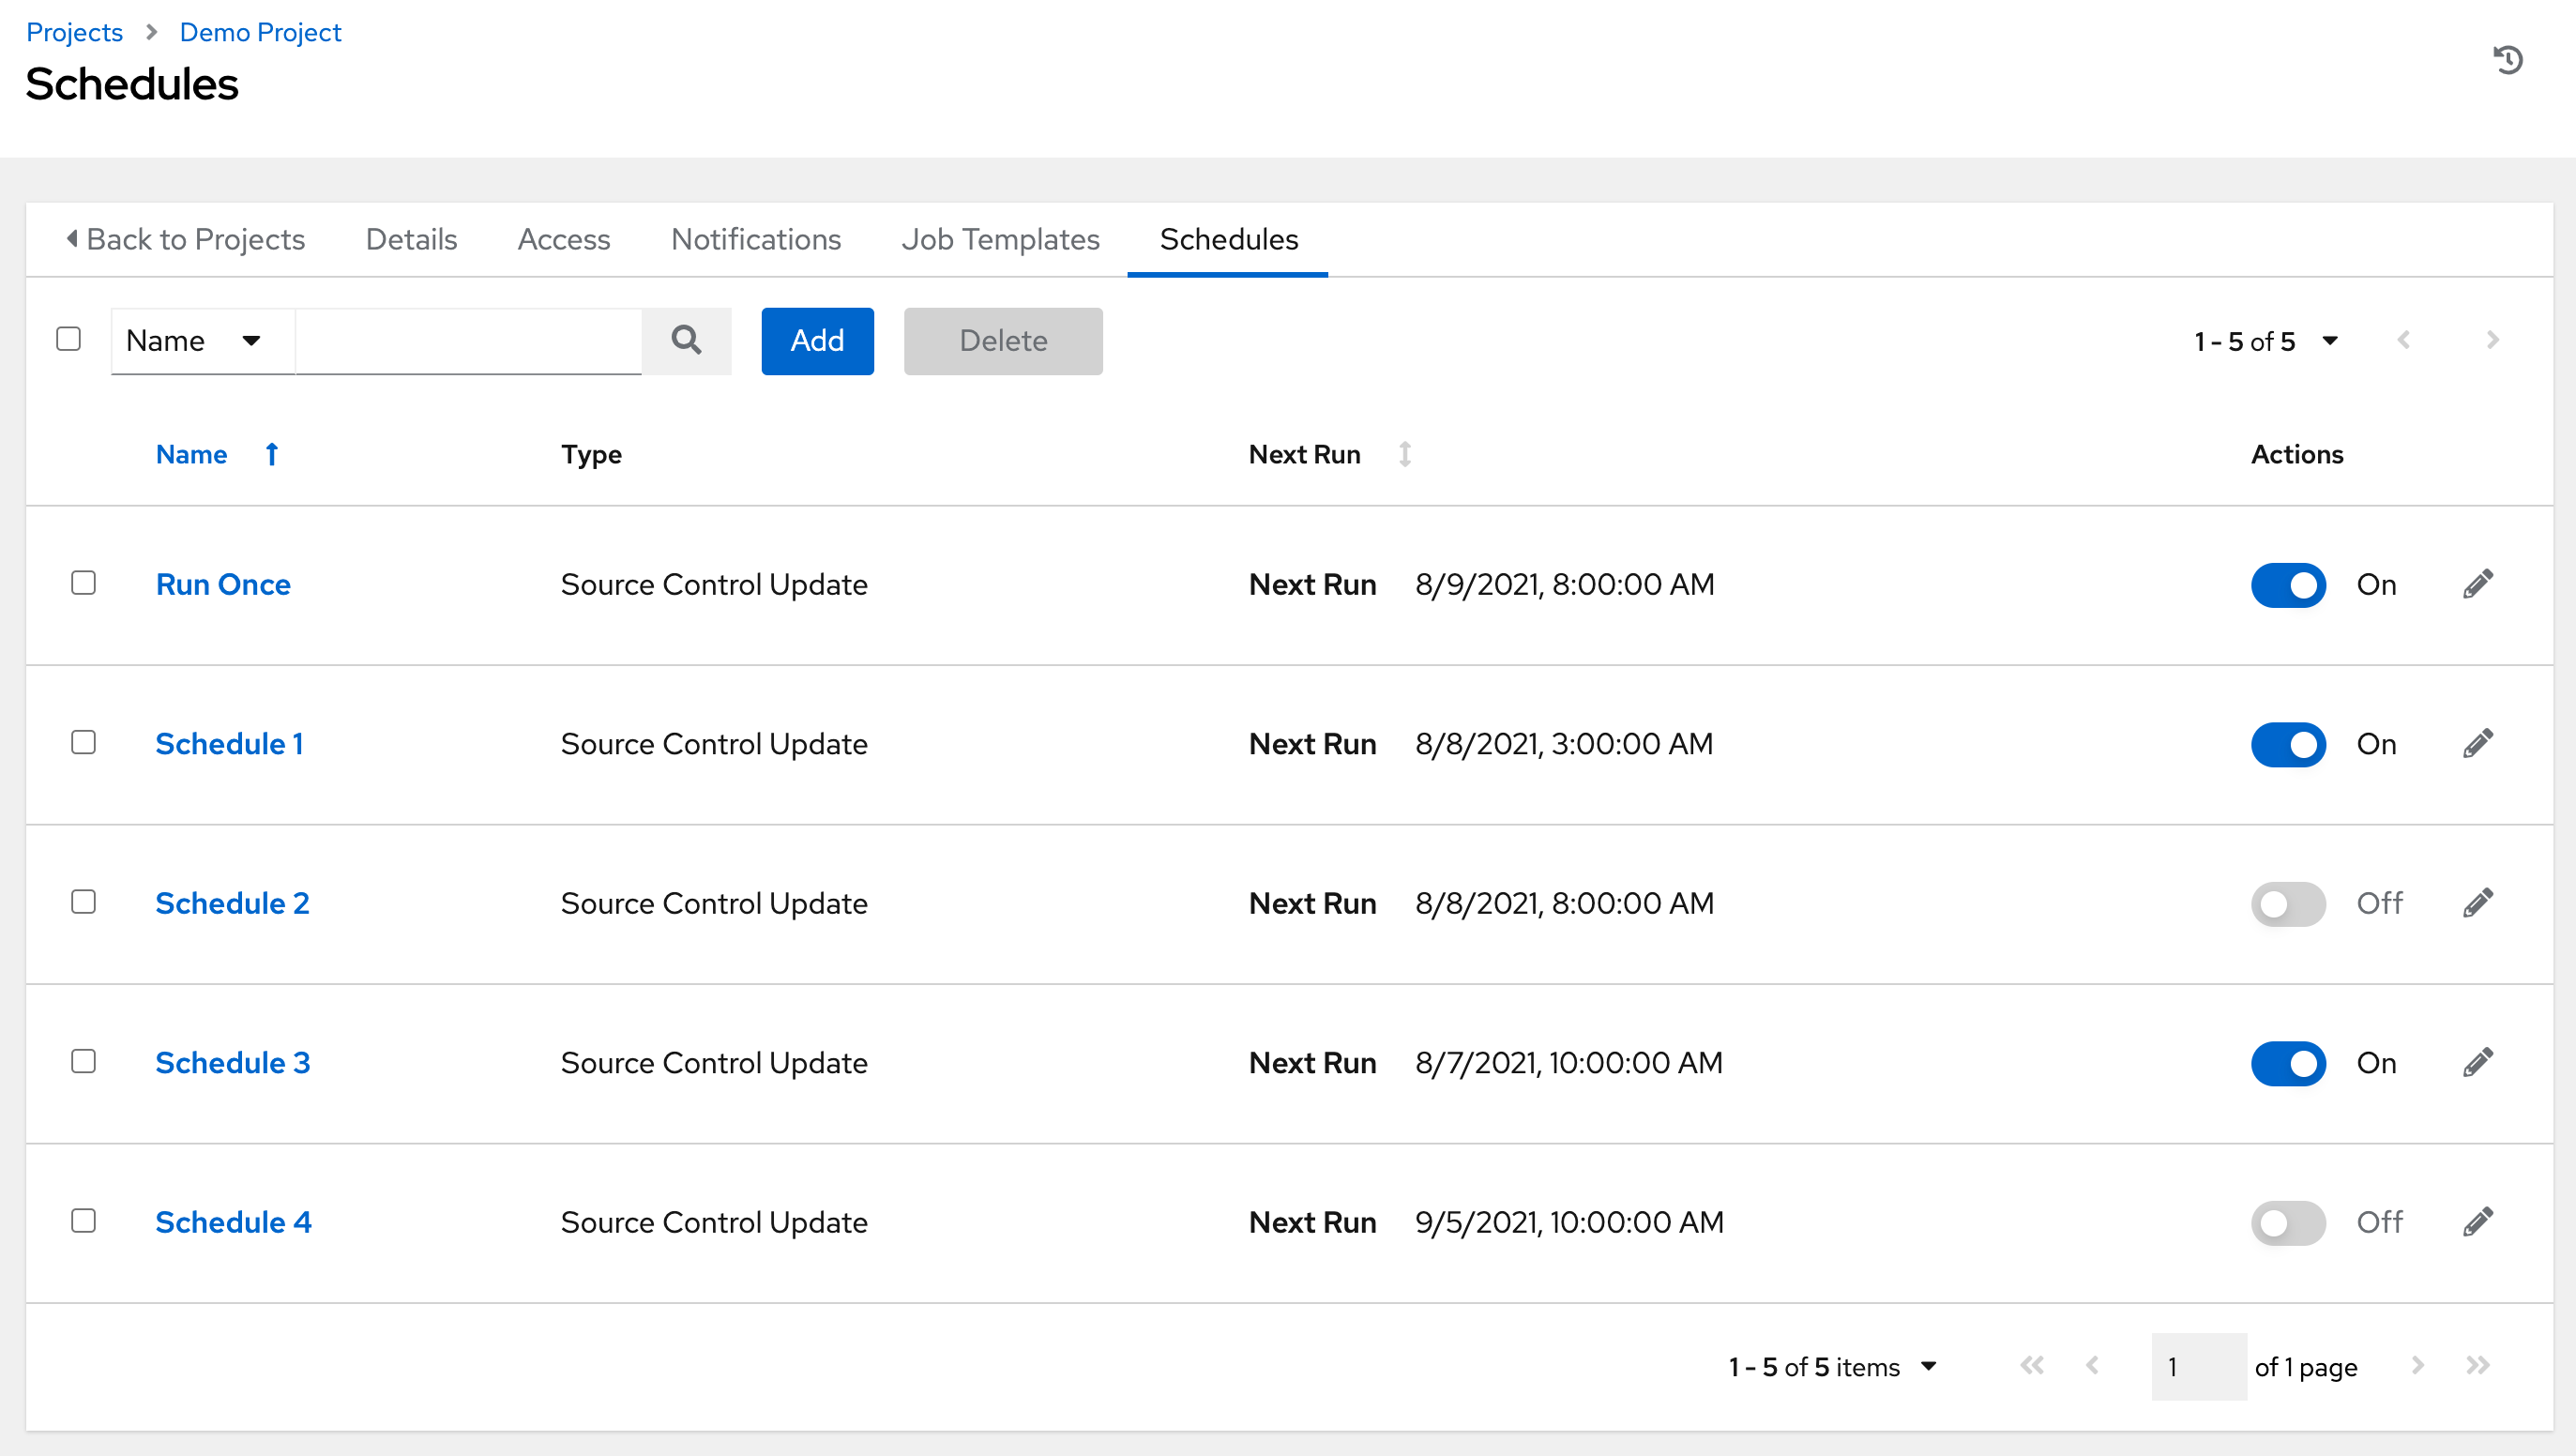
15.6.1. Schedule a Project
To schedule a project run, click the Schedules tab.
If schedules are already set up; review, edit, or enable/disable your schedule preferences.
If schedules have not been set up, refer to Schedules for more information.
15.7. Ansible Galaxy Support
At the end of a Project update, AWX searches for a file called requirements.yml in the roles directory, located at <project-top-level-directory>/roles/requirements.yml. If this file is found, the following command automatically runs:
ansible-galaxy role install -r roles/requirements.yml -p <project-specific cache location>/requirements_roles -vvv
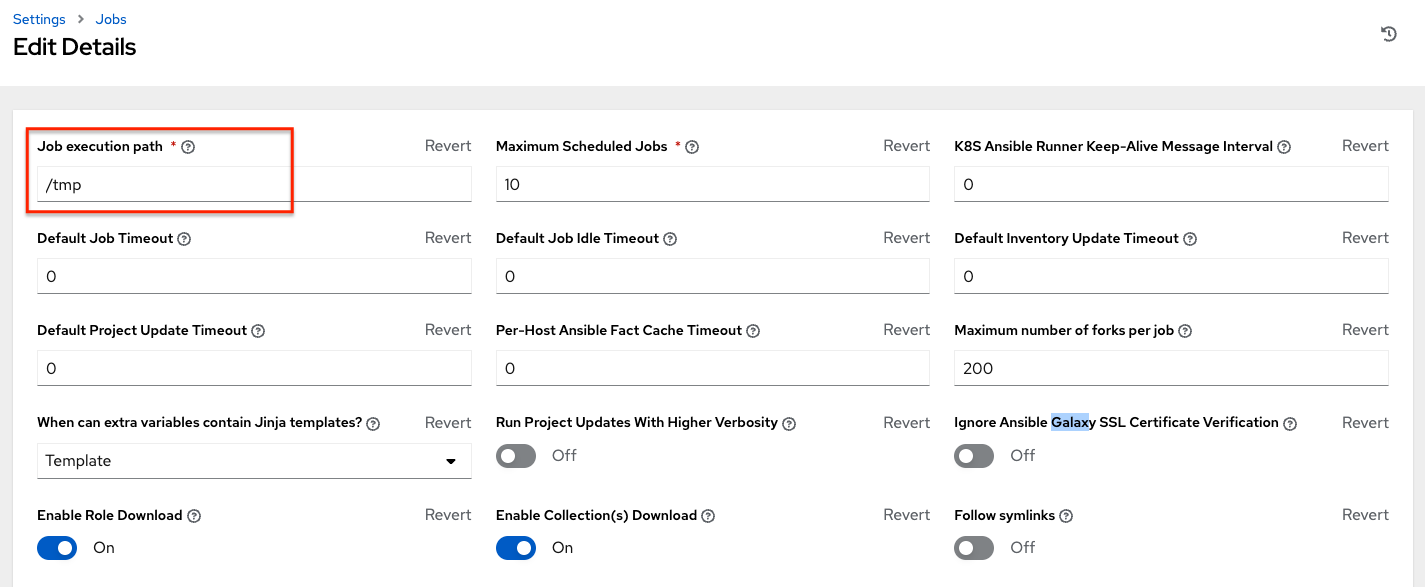
This file allows you to reference Galaxy roles or roles within other repositories which can be checked out in conjunction with your own project. The addition of this Ansible Galaxy support eliminates the need to create git submodules for achieving this result. Given that SCM projects (along with roles/collections) are pulled into and executed from a private job environment, a <private job directory> specific to the project within /tmp is created by default. However, you can specify another Job Execution Path based on your environment in the Jobs Settings tab of the Settings window:
The cache directory is a subdirectory inside the global projects folder. The content may be copied from the cache location to <job private directory>/requirements_roles location.
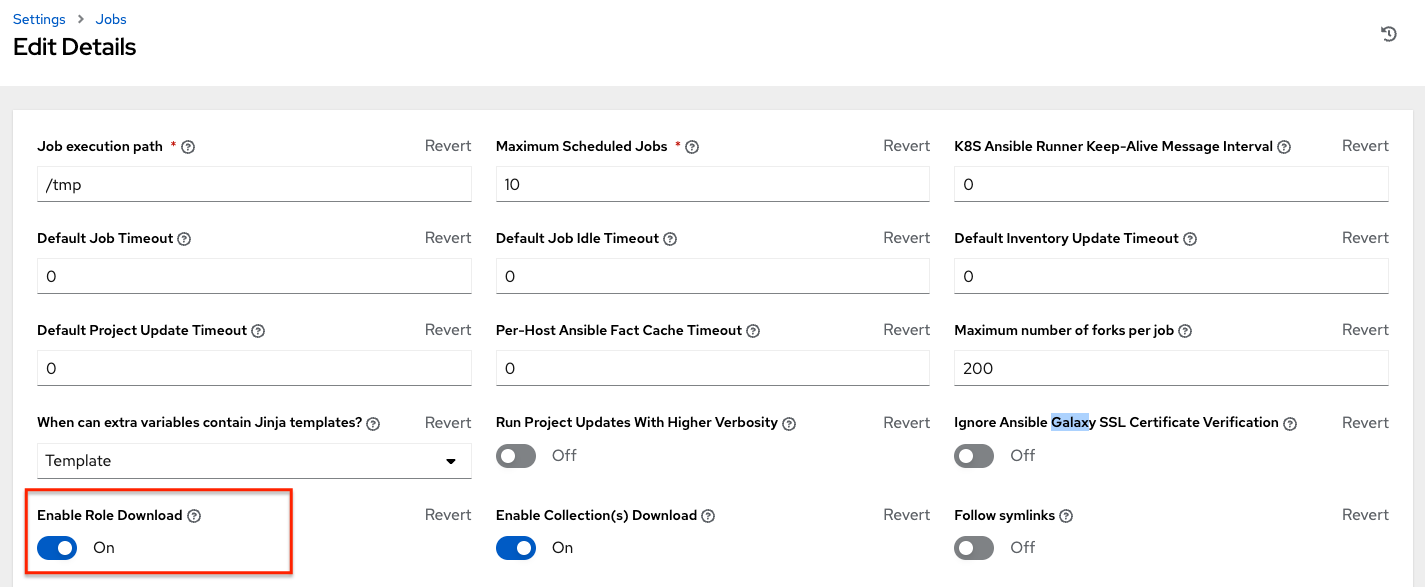
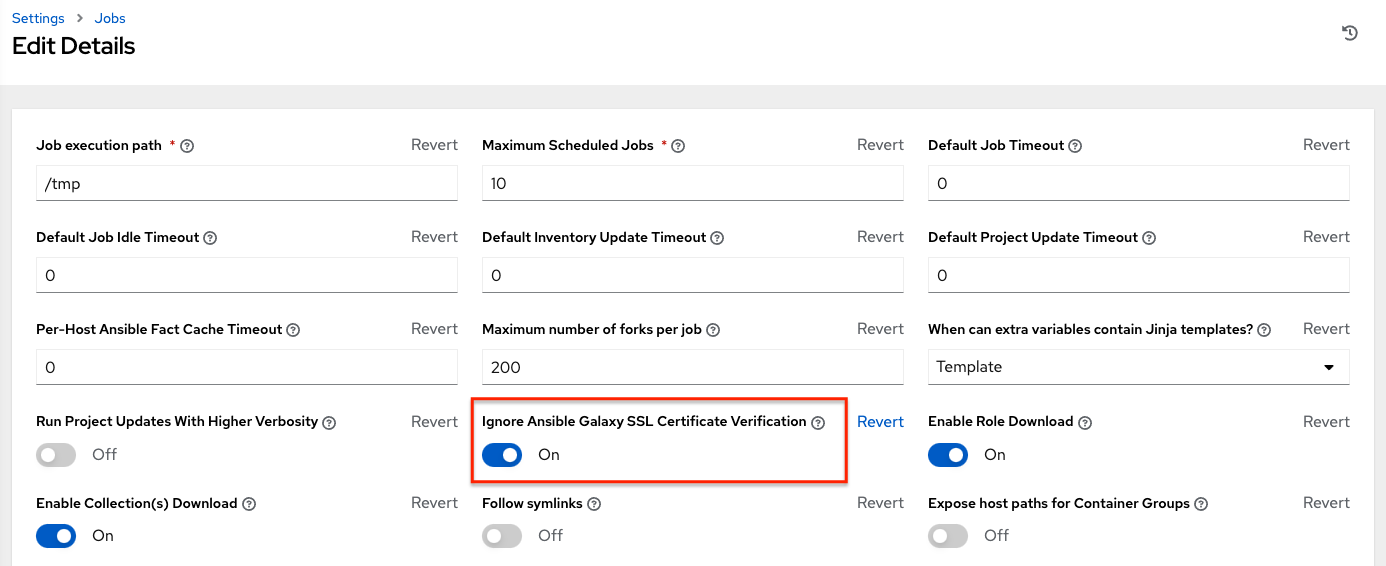
By default, AWX has a system-wide setting that allows roles to be dynamically downloaded from the roles/requirements.yml file for SCM projects. You may turn off this setting in the Jobs settings screen of the Settings menu by switching the Enable Role Download toggle button to OFF.
Whenever a project sync runs, AWX determines if the project source and any roles from Galaxy and/or Collections are out of date with the project. Project updates will download the roles inside the update.
If jobs need to pick up a change made to an upstream role, updating the project will ensure this happens. A change to the role means that a new commit was pushed to the provision-role source control. To make this change take effect in a job, you do not need to push a new commit to the playbooks repo, but you do need to update the project, which downloads roles to a local cache. For instance, say you have two git repositories in source control. The first one is playbooks and the project in AWX points to this URL. The second one is provision-role and it is referenced by the roles/requirements.yml file inside of the playbooks git repo.
In short, jobs would download the most recent roles before every job run. Roles and collections are locally cached for performance reasons, and you will need to select Update Revision on Launch in the project SCM Update Options to ensure that the upstream role is re-downloaded before each job run:

The update happens much earlier in the process than the sync, so this surfaces errors and details faster and in a more logic place.
For more information and examples on the syntax of the requirements.yml file, refer to the role requirements section in the Ansible documentation.
If there are any directories that should specifically be exposed, you can specify those in the Jobs section of the Settings screen in the Paths to Expose to Isolated Jobs or by updating the following entry in the settings file:
AWX_ISOLATION_SHOW_PATHS = ['/list/of/', '/paths']
Note
The primary file you may want to add to
AWX_ISOLATION_SHOW_PATHSis/var/lib/awx/.ssh, if your playbooks need to use keys or settings defined there.
If you made changes in the settings file, be sure to restart services with the awx-service restart command after your changes have been saved.
In the User Interface, you can configure these settings in the Jobs settings window.

15.8. Collections Support
AWX supports project-specific Ansible collections in job runs. If you specify a collections requirements file in the SCM at collections/requirements.yml, AWX will install collections in that file in the implicit project sync before a job run.
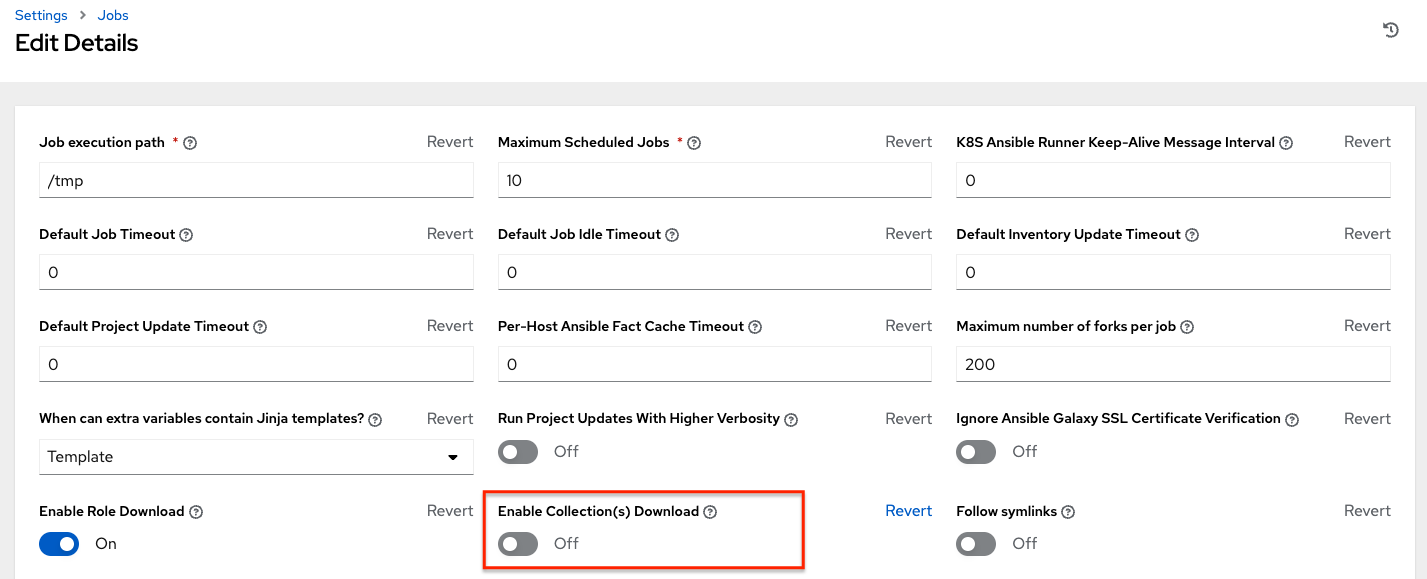
By default, AWX has a system-wide setting that allows collections to be dynamically downloaded from the collections/requirements.yml file for SCM projects. You may turn off this setting in the Jobs settings tab of the Settings menu by switching the Enable Collections Download toggle button to OFF.
Roles and collections are locally cached for performance reasons, and you will need to select Update Revision on Launch in the project SCM Update Options to ensure this:
15.8.1. Using Collections via Hub
Before AWX can use Automation Hub as the default source for collections content, you need to create an API token in the Automation Hub UI so that it could be specified in AWX. You may connect to a private Automation Hub or a public Automation Hub collection, the only difference is which URL you specify.
Navigate to https://cloud.redhat.com/ansible/automation-hub/token and click Load token.
Click the copy icon to copy the API token to the clipboard.
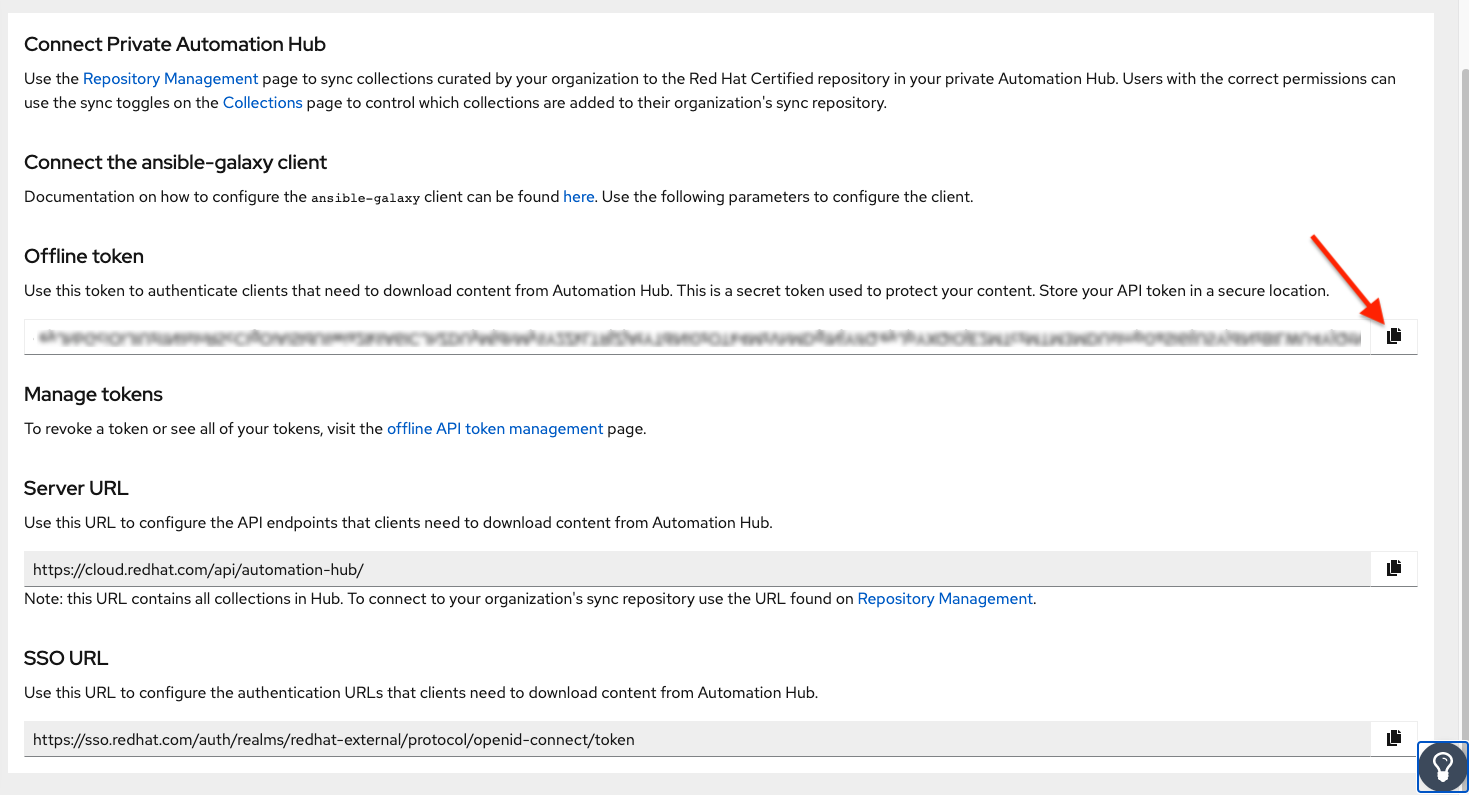
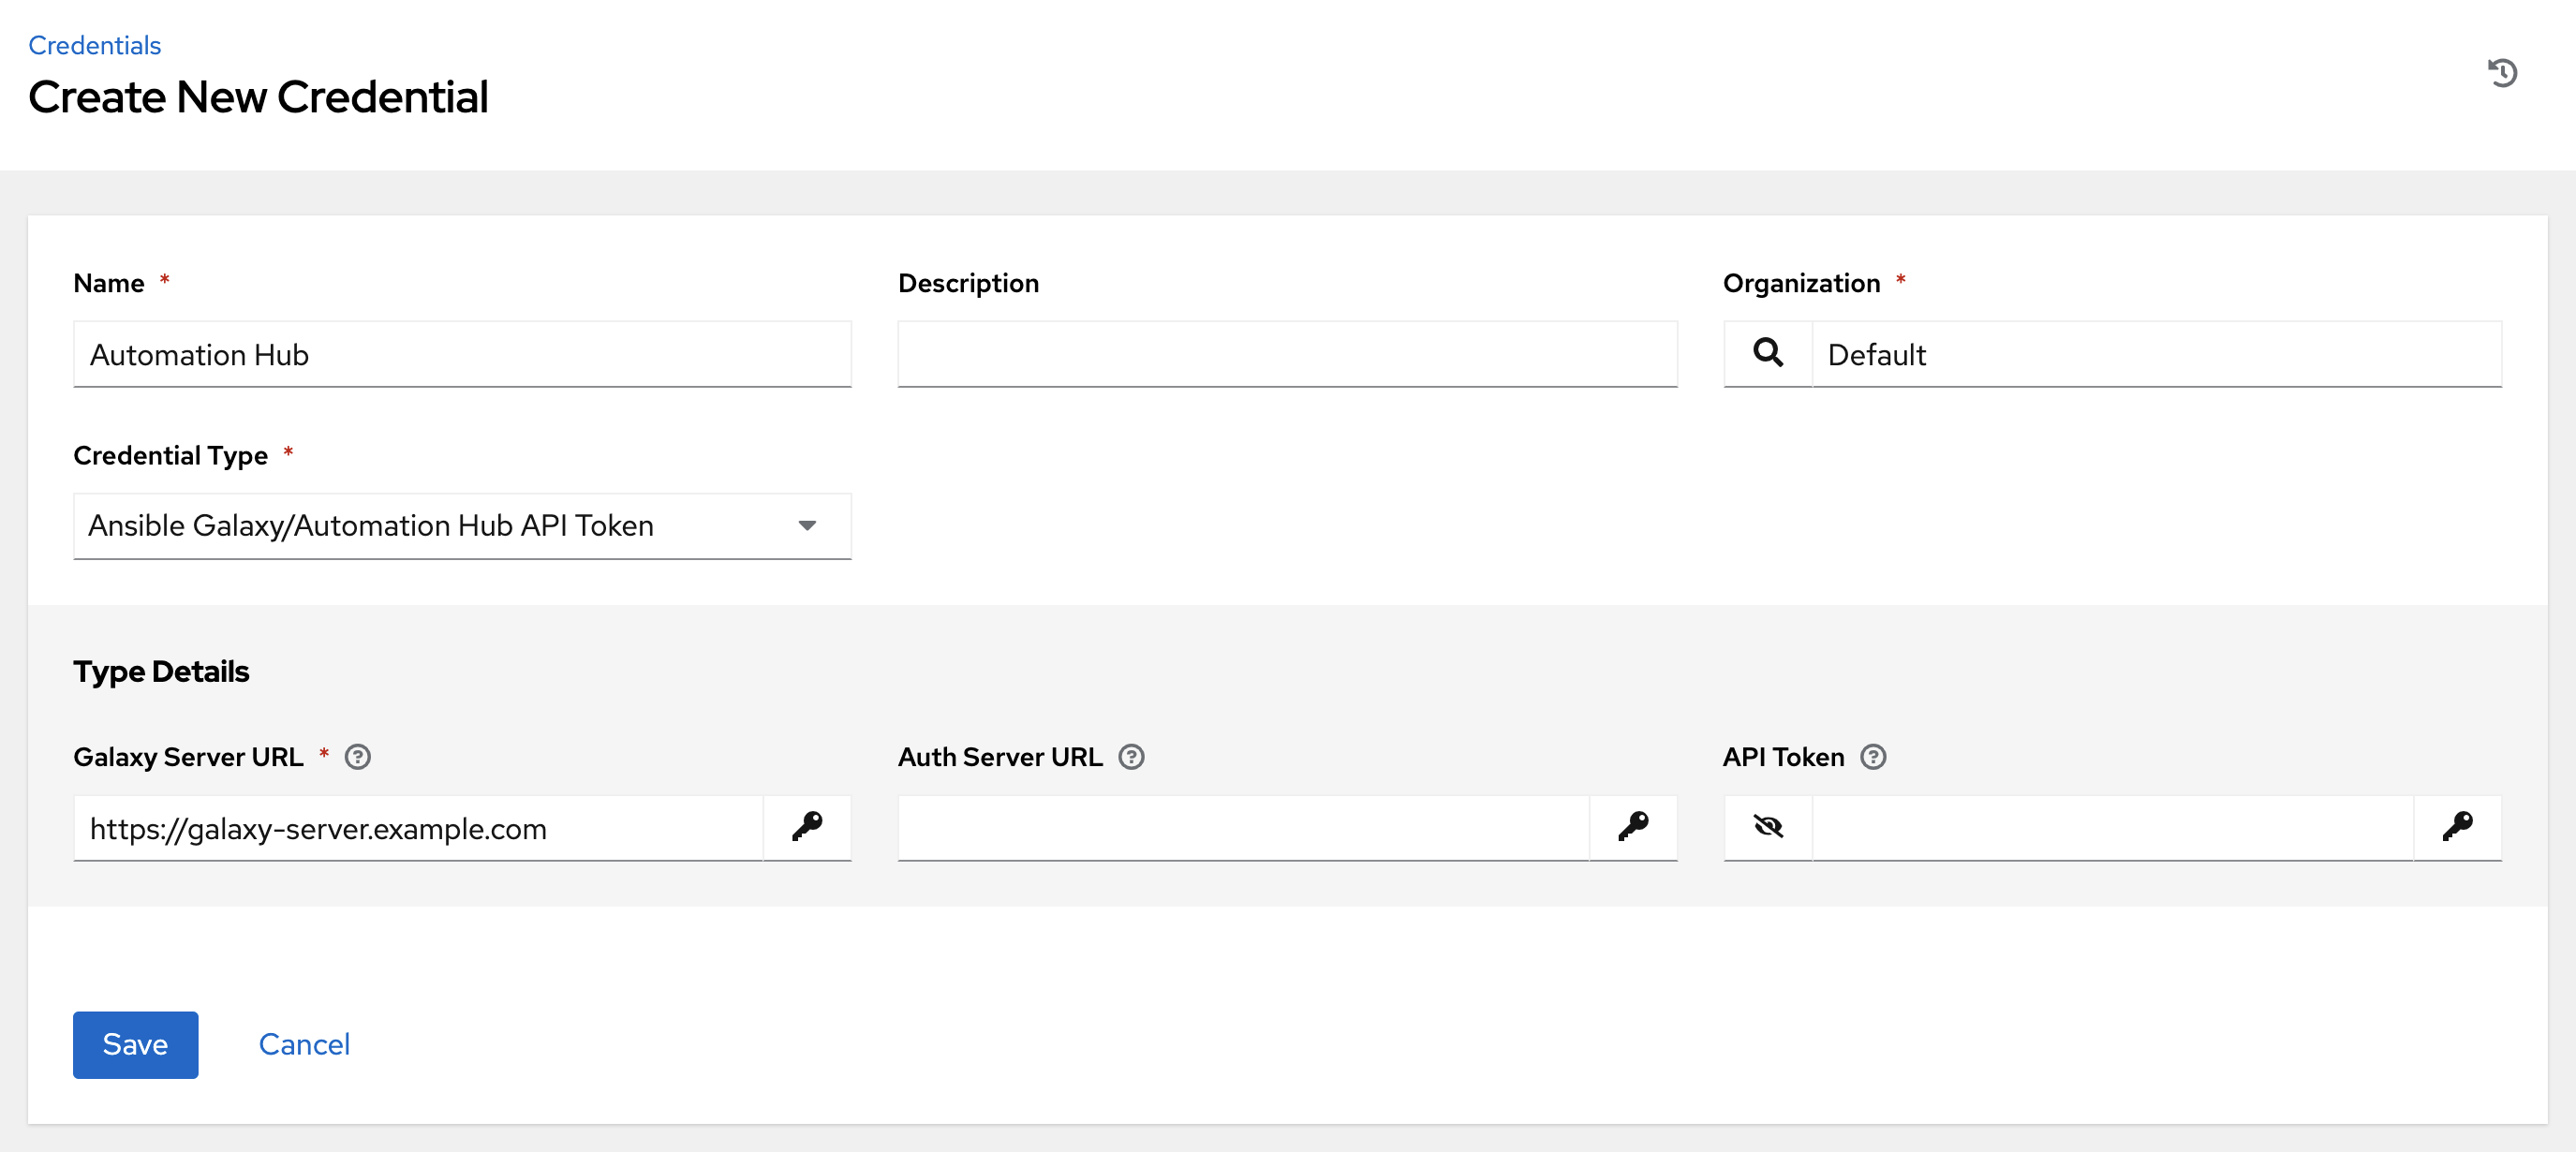
To use the public Automation Hub, create an Automation Hub credential using the copied token and pointing to the URLs shown in the Server URL and SSO URL fields of the token page:
Galaxy Server URL =
https://cloud.redhat.com/api/automation-hub/AUTH SEVER URL =
https://sso.redhat.com/auth/realms/redhat-external/protocol/openid-connect/token
To use a private Automation Hub, create an Automation Hub credential using a token retrieved from the Repo Management dashboard of your local Automation Hub and pointing to the published repo URL as shown:
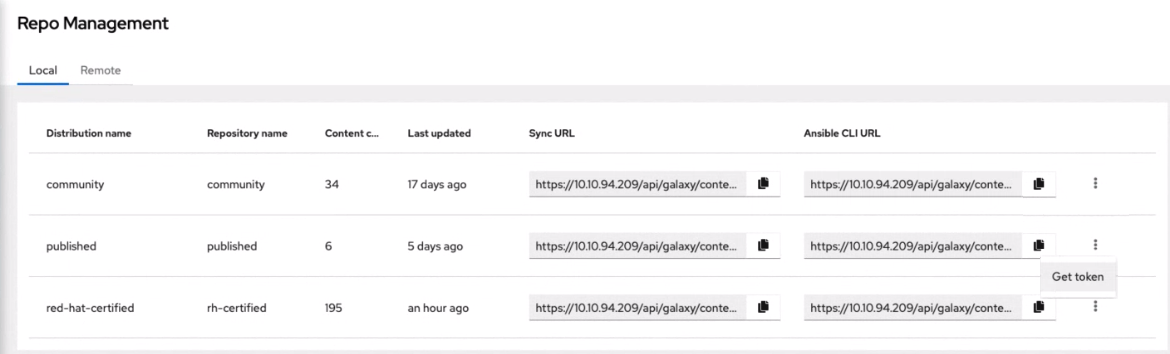
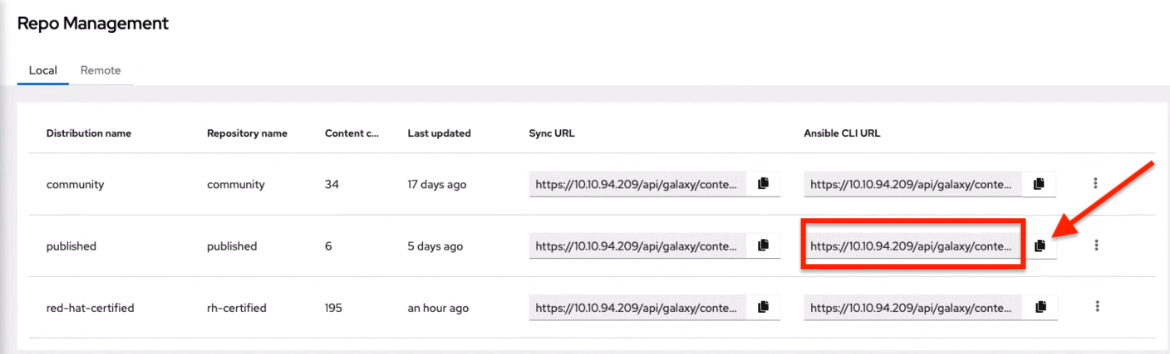
You can create different repos with different namespaces/collections in them. But for each repo in Automation Hub you need to create a different Automation Hub credential. Copy the Ansible CLI URL from the Automation Hub UI in the format of https://$<hub_url>/api/galaxy/content/<repo you want to pull from> into the Galaxy Server URL field of the Create Credential form:
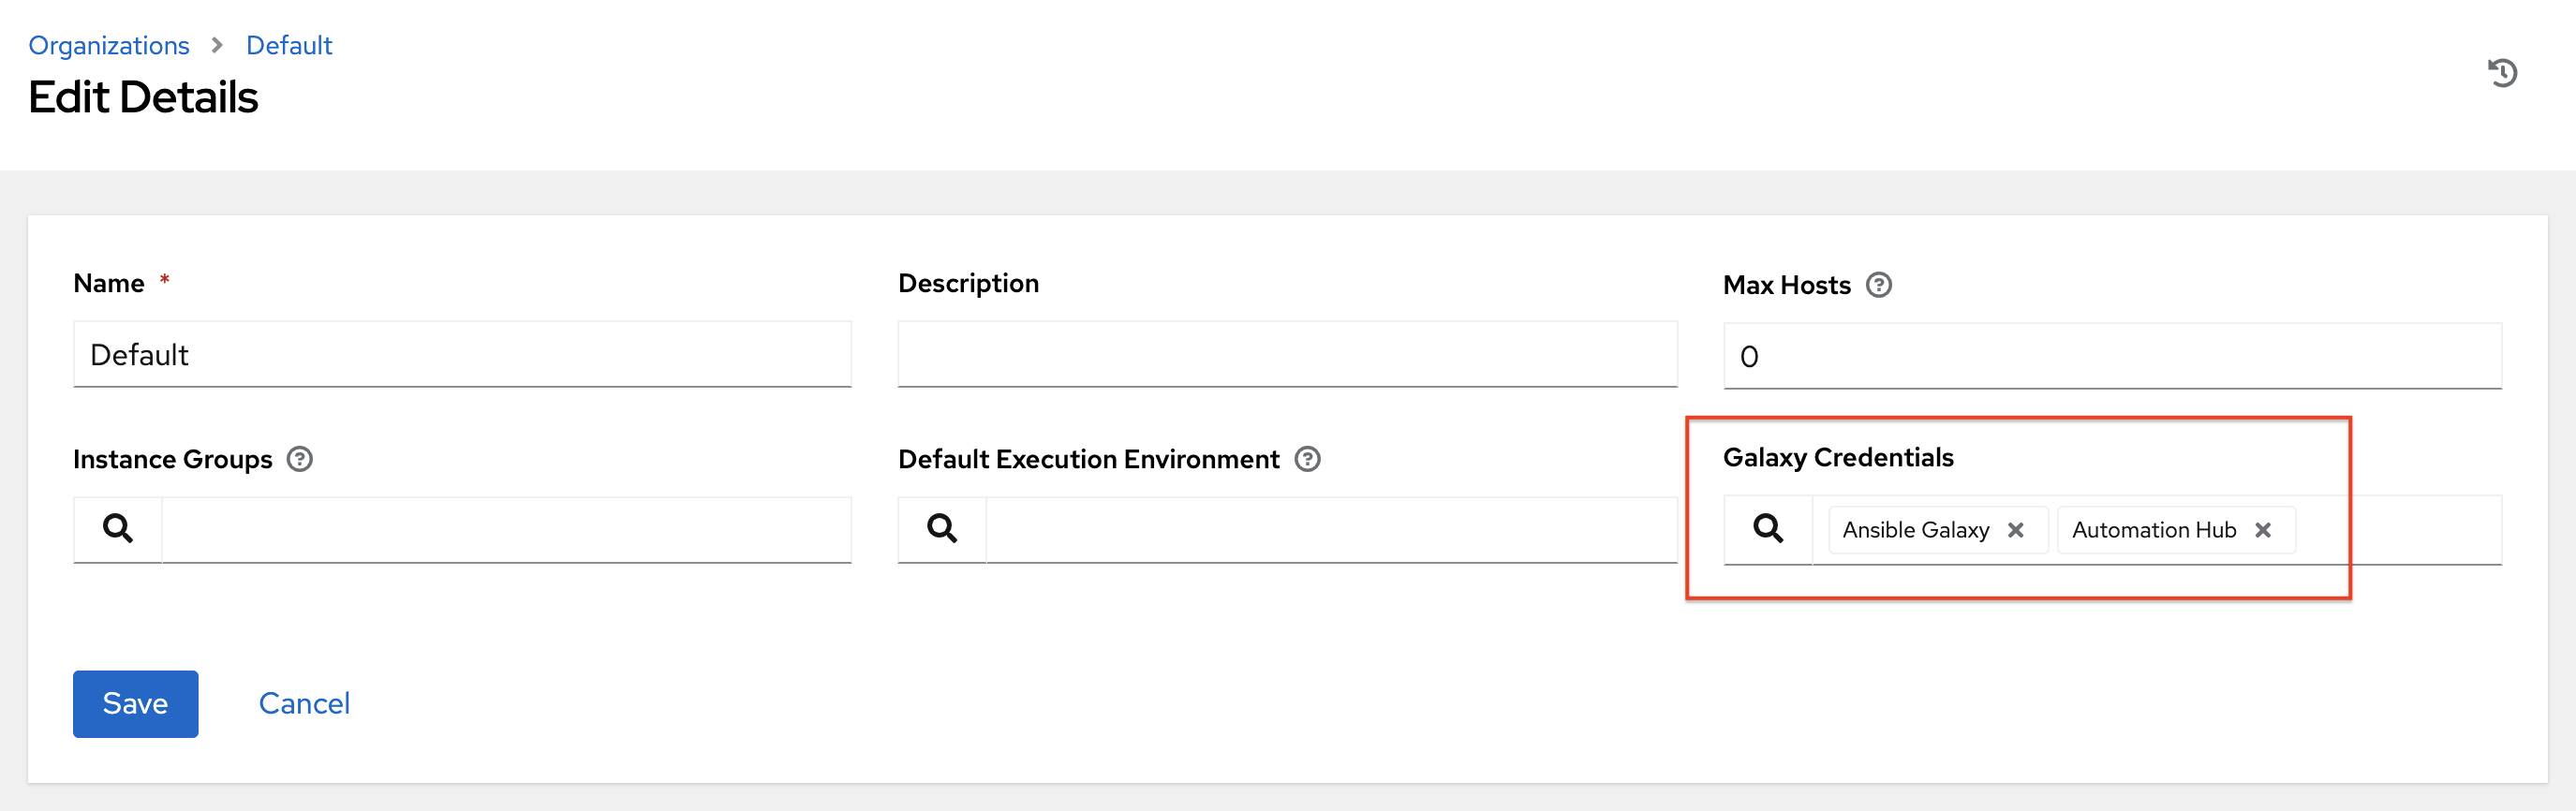
Navigate to the organization for which you want to be able to sync content from Automation Hub and add the new Automation Hub credential to the organization. This step allows you to associate each organization with the Automation Hub credential (i.e. repo) that you want to be able to use content from.
Note
Suppose you have two repos:
Prod:
Namespace 1andNamespace 2, each with collectionAandBso:namespace1.collectionA:v2.0.0andnamespace2.collectionB:v2.0.0Stage:
Namespace 1with only collectionAso:namespace1.collectionA:v1.5.0on Automation Hub, you will have a repo URL for Prod and Stage.
You can create an Automation Hub credential for each one. Then you can assign different levels of access to different organizations. For example, you can create a Developers organization has access to both repos, while an Operations organization just has access to the Automation Hub Prod repo only.
If the Automation Hub has self-signed certificates, click the toggle to enable the setting Ignore Ansible Galaxy SSL Certificate Verification. For public Automation Hub, which uses a signed certificate, click the toggle to disable it instead. Note this is a global setting:
Create a project, where the source repository specifies the necessary collections in a requirements file located in the
collections/requirements.ymlfile. Refer to the syntax described in the corresponding Ansible documentation.
In the Projects list view, click
to run an update against this project. AWX fetches the Galaxy collections from the collections/requirements.ymlfile and report it as changed; and the collections will now be installed for any job template using this project.
Note
If updates are needed from Galaxy or Collections, a sync is performed that downloads the required roles, consuming that much more space in your /tmp file. In cases where you have a big project (around 10 GB), disk space on /tmp may be an issue.
For more information on collections, refer to Using Collections.